WIP: F-14 B/D
-
Funny you should mention that, I was thinking about it when I wrote that then I figured it must be excluded from the 30k.
 gotta love a good challenge
 -
I think I see now. I’d remove anything that will never be visible*. Typically (from non-BMS modeling), I’ll delete the faces leading up to the intersection, then select two edges and pres F to create a new face spanning the gap. Though I guess this approach might make it more difficult to add in extra detail later with a curvy surface and a flat(ish) one that isn’t on a perfect YZ plane.
-
I think I see now. I’d remove anything that will never be visible*. Typically (from non-BMS modeling), I’ll delete the faces leading up to the intersection, then select two edges and pres F to create a new face spanning the gap. Though I guess this approach might make it more difficult to add in extra detail later with a curvy surface and a flat(ish) one that isn’t on a perfect YZ plane.
‘the face spanning the gap’ is the one you see in my picture. It is a perfect xy plane and it is on the inside of the intake. The backside of that face is what you see inside the ‘triangle’ between the upper outside part of the top intake and the lower outside part of the fuselage finish. I’ll mark it tomo to make it clear. I guess it shouldn’t be a problem for now.
Thanks for the input man!
-
Yeah, 3D geometry descriptive text isn’t easy. Maybe turn on backface culling* so you can make sure it’s the correct direction? Hmm, but you’re doing a render so it might not show up there. Still, I may not have a perfect understanding.
- just in case: press ‘n’ to toggle side panel -> Shading -> Backface Culling. FWIW I usually model with Ambient Occlusion turned on too 'cause pretties.
No need to hurry man, family functions might delay me a few days.
Have a good holiday (or a good normal day if this isn’t your holiday). -
WaveyDave said his Tornado at 30K tris should be a upper limit in terms of desired spec so that should work.
The Tornado is < 18k including the landing gear, but 30K tris is the BMS requirement.
Funny you should mention that, I was thinking about it when I wrote that then I figured it must be excluded from the 30k.
gotta love a good challengeFor confirmation, the 30K requirement does include the landing gear, afterburner flames etc.
Regards
Dave -
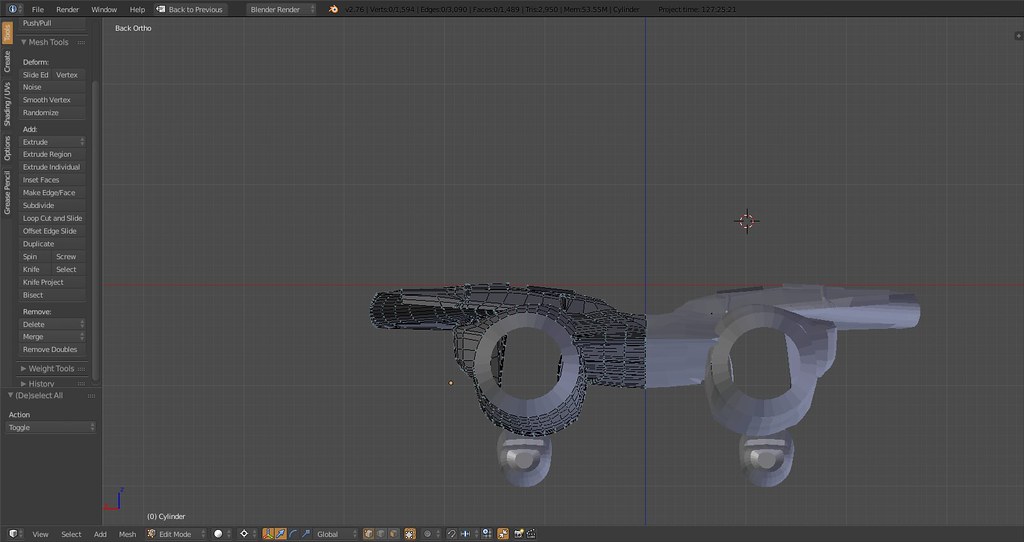
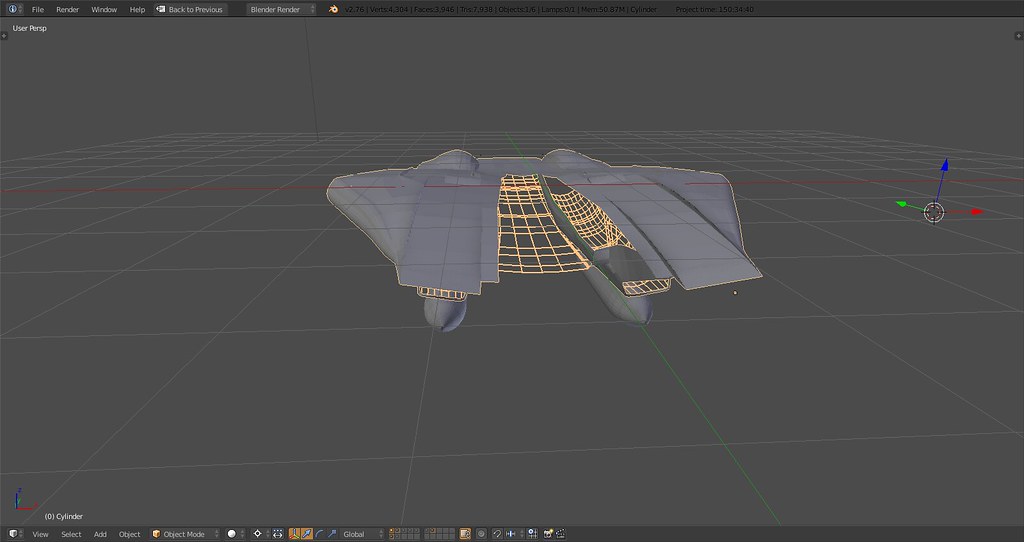
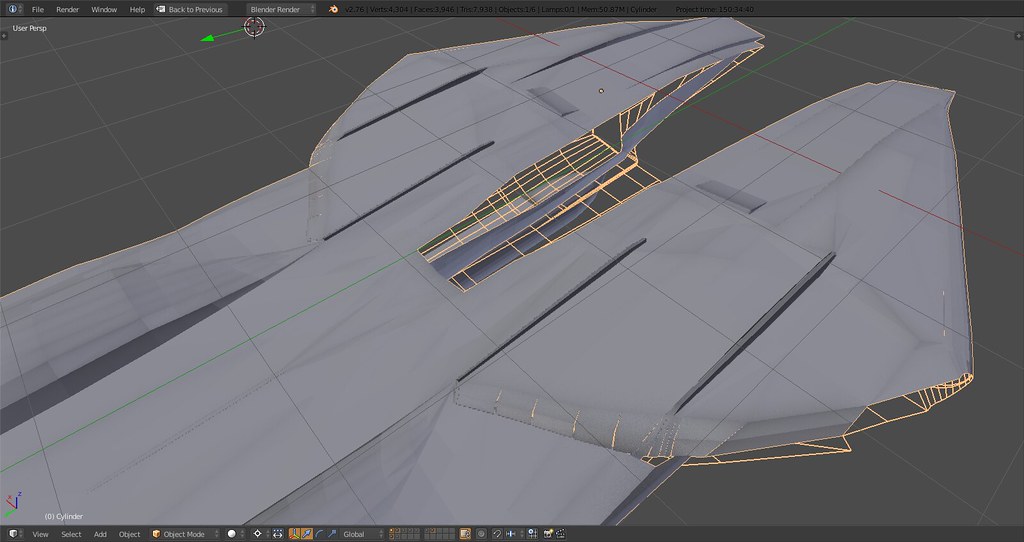
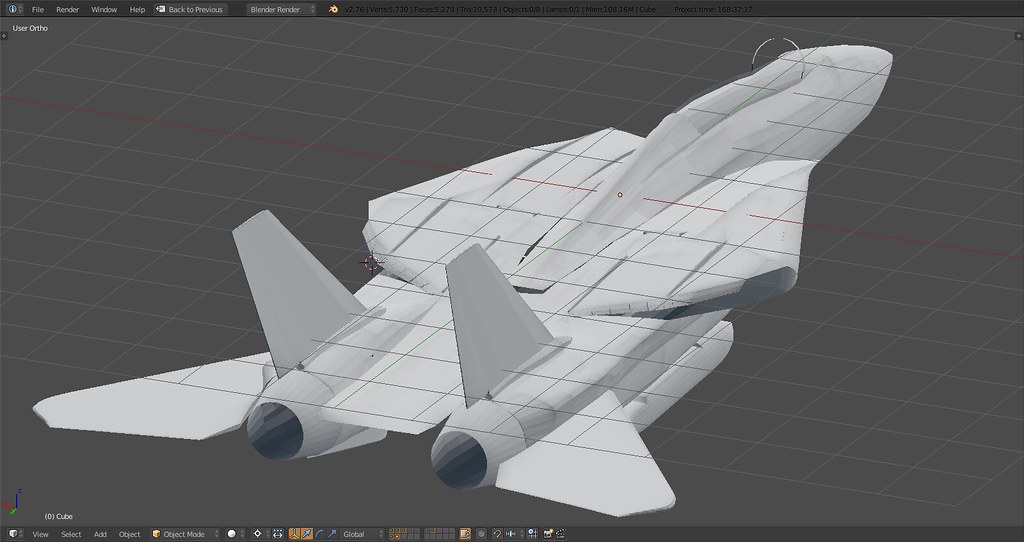
Small update, cracked the 100hrs, spent a lot of time on the glovebox, especially the rear deck which turns out to be an absolute pain. Upside is that most other Tomcat models I’ve checked haven’t gotten that part correct so that adds motivation :).
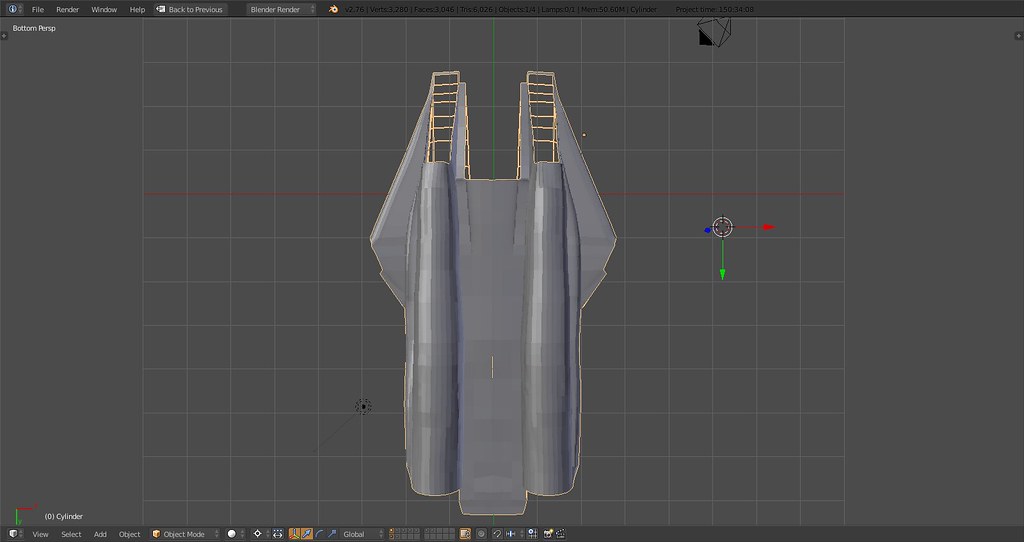
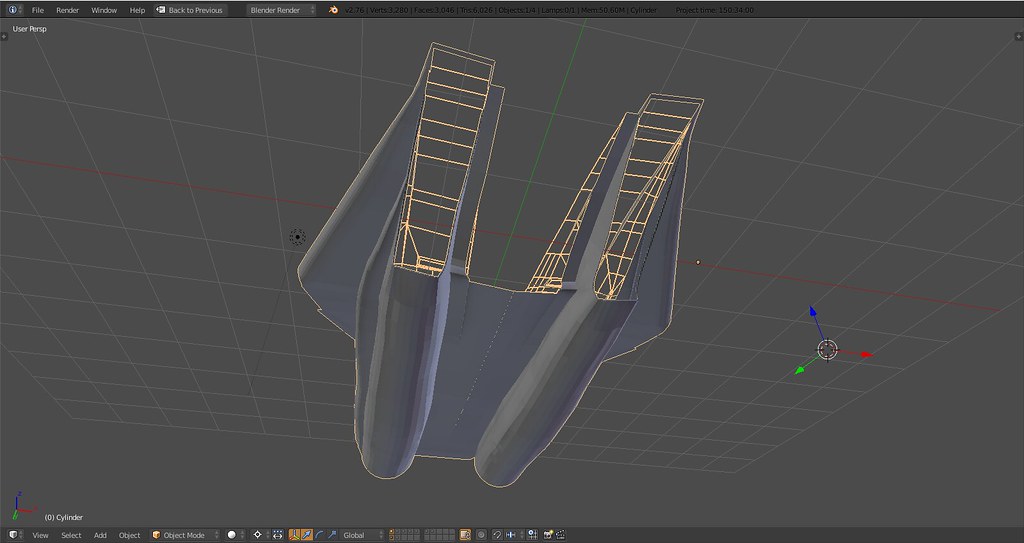
There are two lines kinda intersecting on the topside that really give the Cat its unique look, if it were a car I’d say they’re character lines. So here they are:
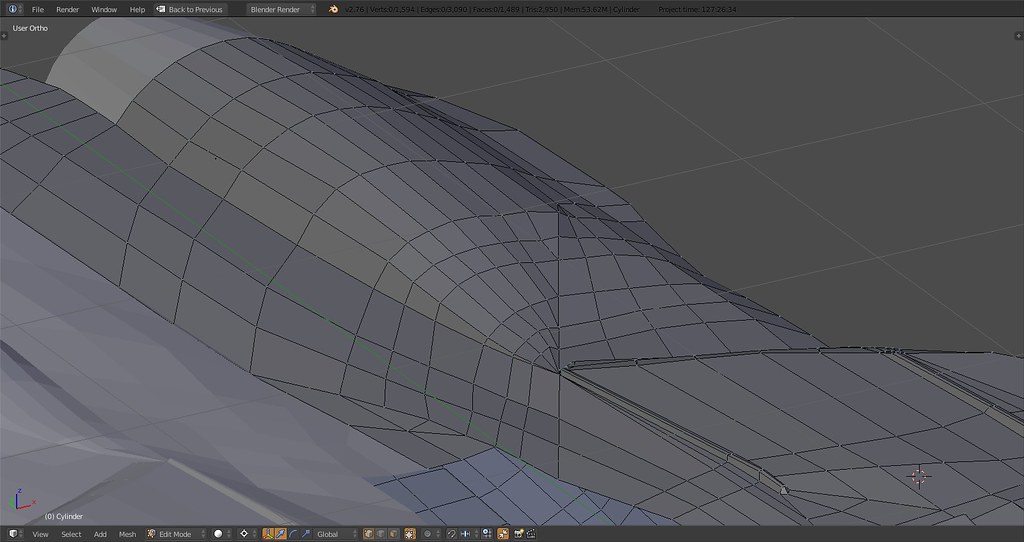
One line goes from the inner topside stabilizer to the rear along the inside of the top engine housing. The other goes from the center topside aft to the outside ending in the edge of the inflatable wing glove bags. Had to remodel almost the whole backside and add many parts to get it right.
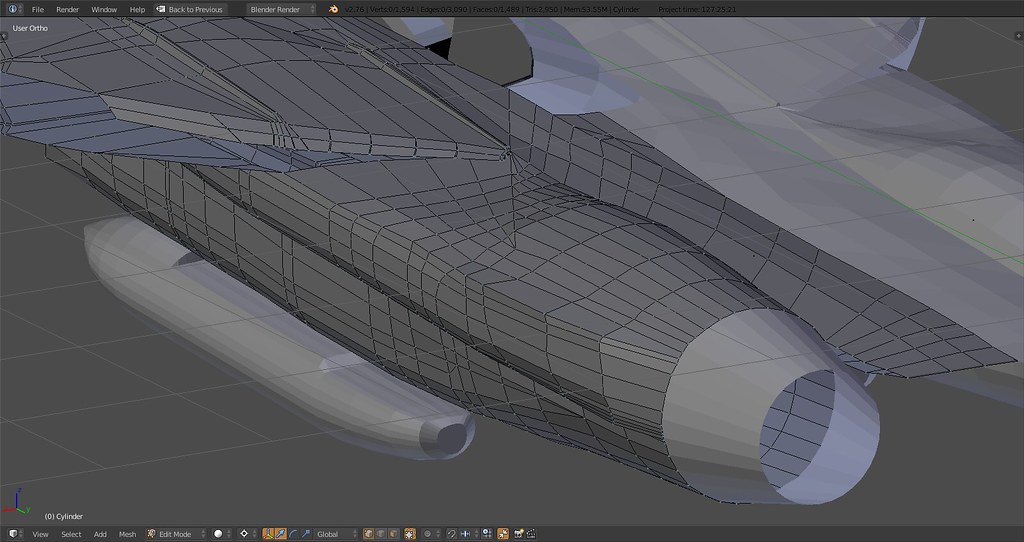
This is the detail I’ll model the other parts to as well before moving to 3ds. Apart from some minor modifications and details the glovebox/enginepod is done for now.
Some more visuals:
Scale wise we’re looking good as well:
Out for 2015
") Catch ya next year, Baby.
Catch ya next year, Baby.PS: The bottom side (engine pods) is not finalized in shape and currently deformed due to my modification of the topside.
-
Zimluura,
awesome hint re the backface culling! Activated it along with the ambient occlusion. Very useful view function.
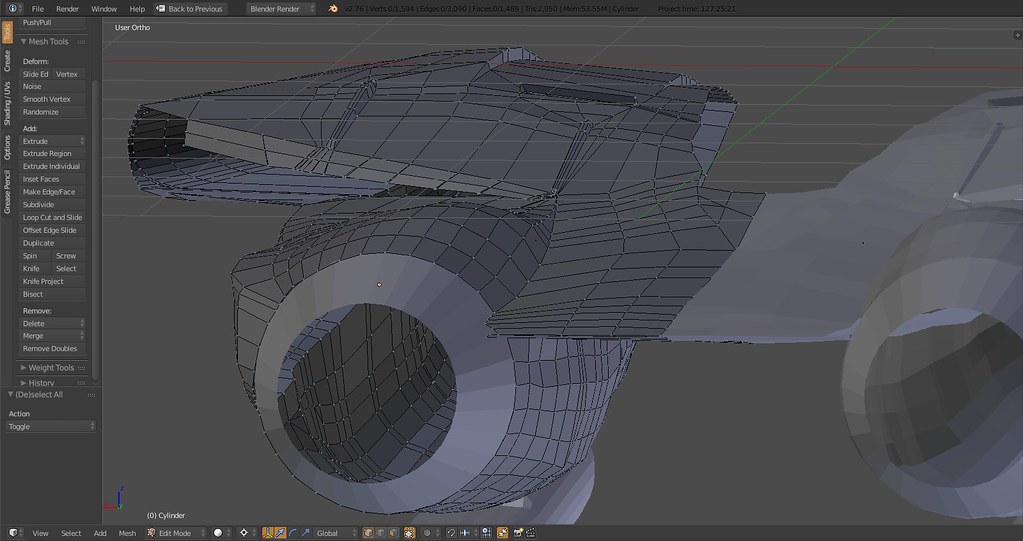
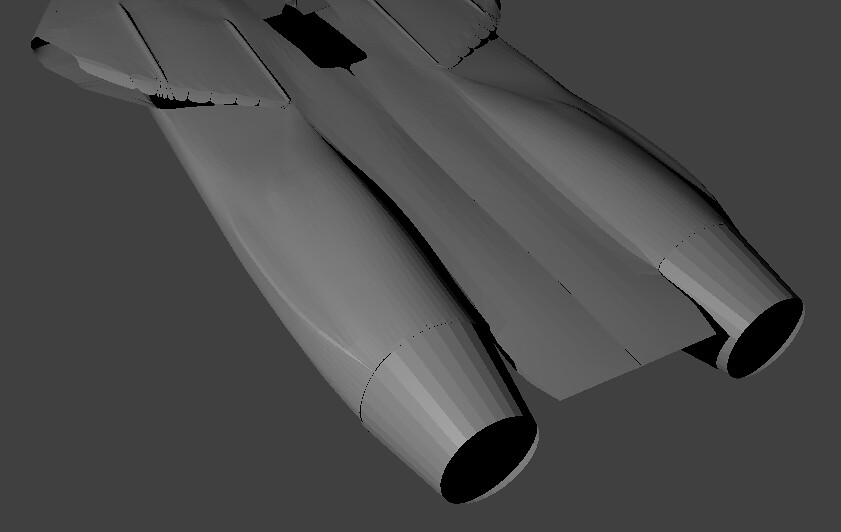
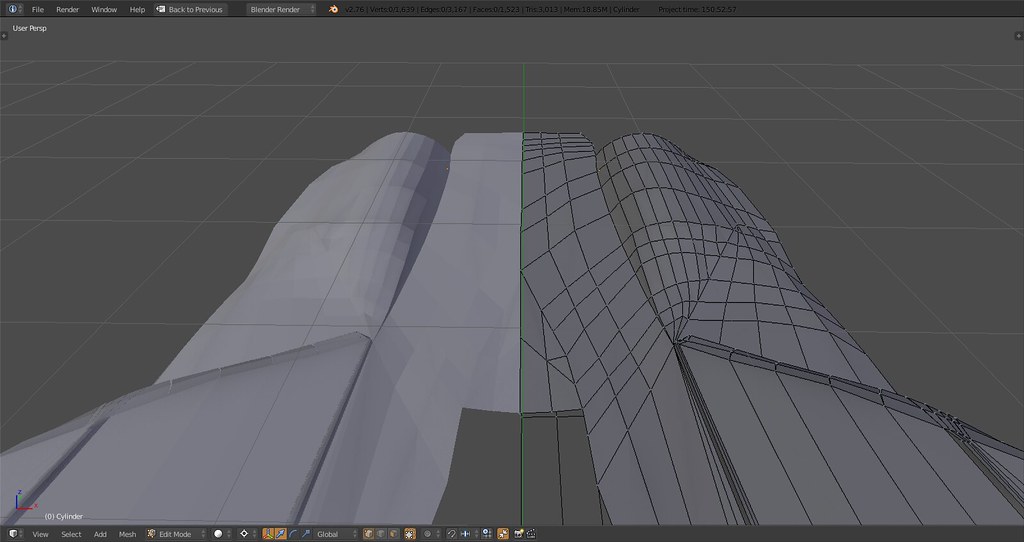
I looked into my double sided faces problem and based on what I found I decided to duplicate and flip the relevant faces which apparently is easier on the hardware than double sided faces. I just duplicated and narrowly extruded the inside of the inner intake and flippd them. Result looks fine pending some nitty gritty adjustments.
Thanks for the hint.
As you can see the upper part of the inner intake is drawn on the right and see through on the left - hence the flipped face.
Yeah, 3D geometry descriptive text isn’t easy. Maybe turn on backface culling* so you can make sure it’s the correct direction? Hmm, but you’re doing a render so it might not show up there. Still, I may not have a perfect understanding.
- just in case: press ‘n’ to toggle side panel -> Shading -> Backface Culling. FWIW I usually model with Ambient Occlusion turned on too 'cause pretties.
No need to hurry man, family functions might delay me a few days.
Have a good holiday (or a good normal day if this isn’t your holiday). -
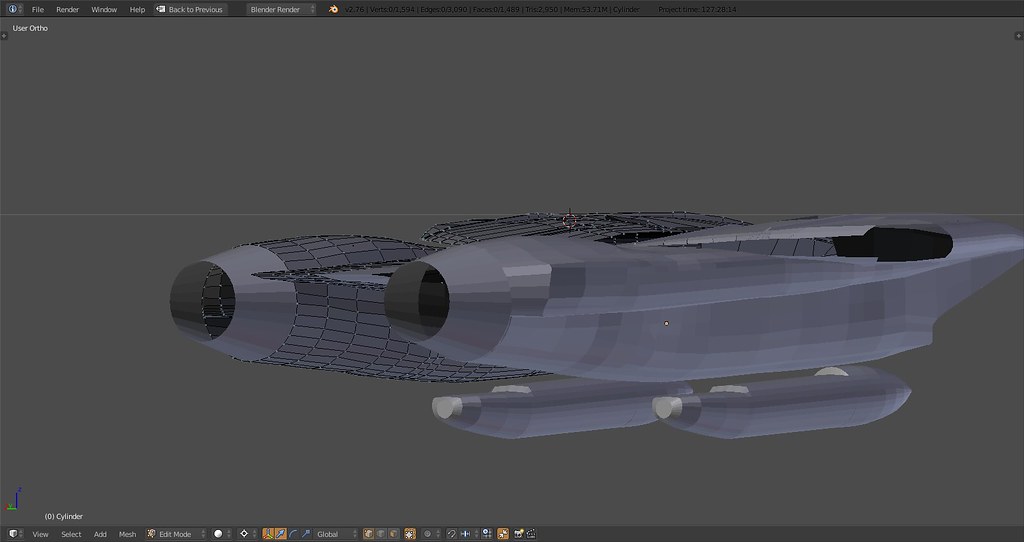
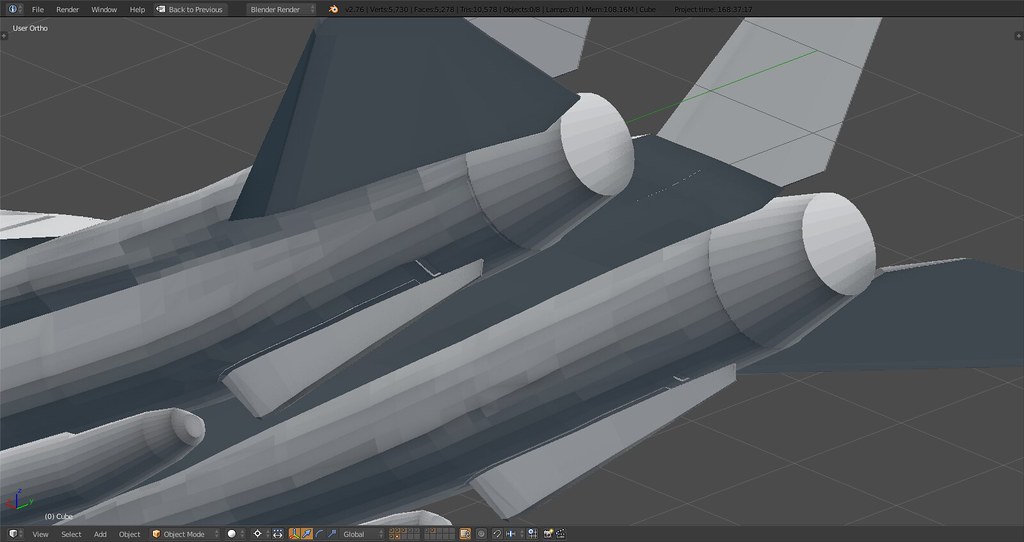
Couldn’t go into the new year leaving the bottom side messed up like that so I touchd it up a bit. Extended the fuselage side below the glove to make room for the main gear housing. Also narrowed the engine pods on the outside bow, smoothed them aft. With reference shot courtesy US NAVY.
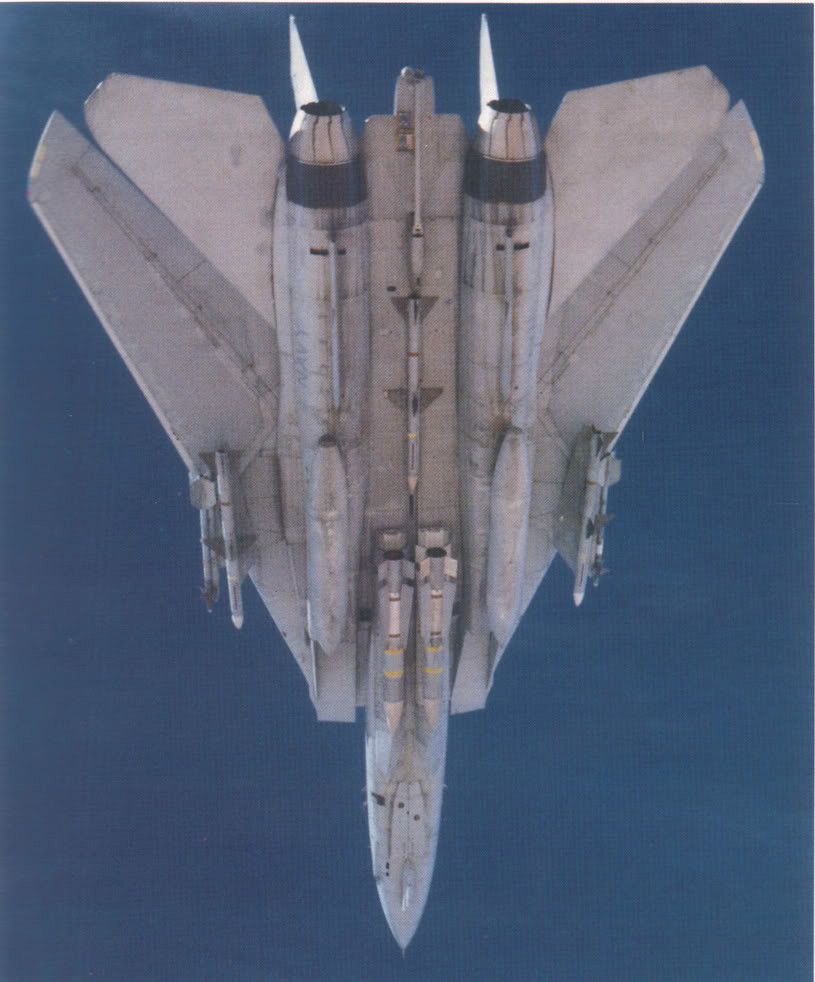
And another reference shot re fuselage side and reardeck from yesterday’s update:

Catch ya later, Baby.
-
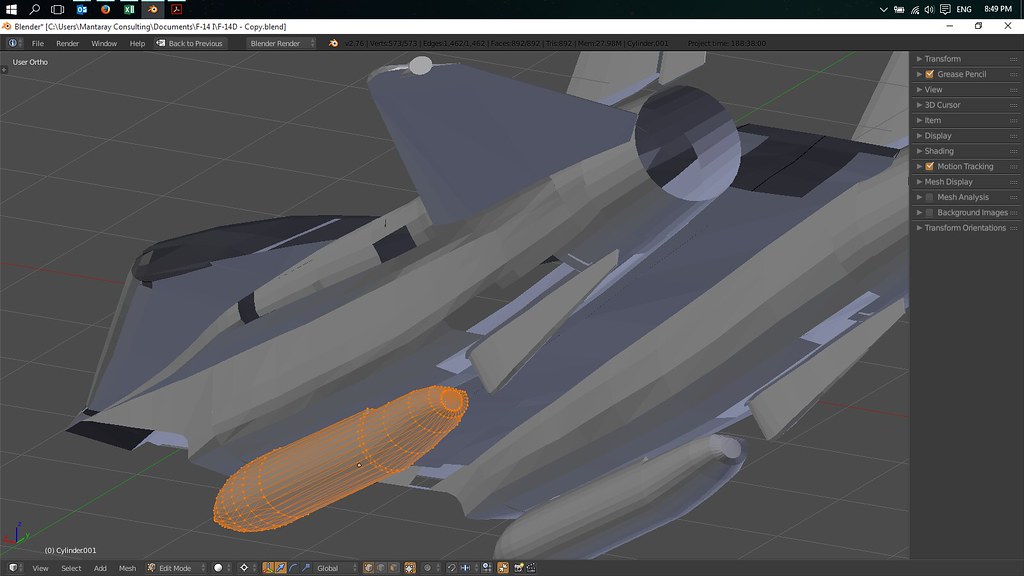
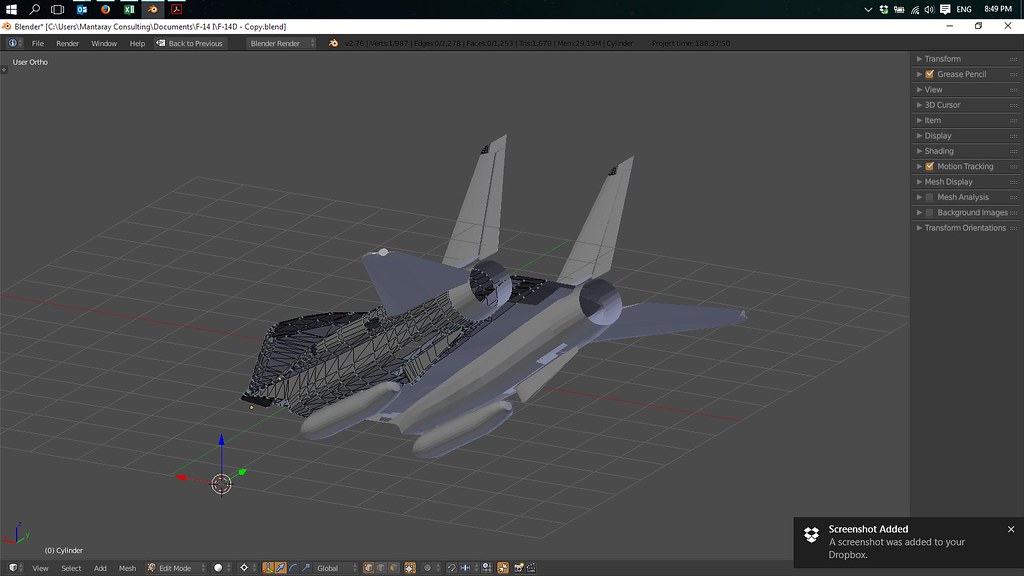
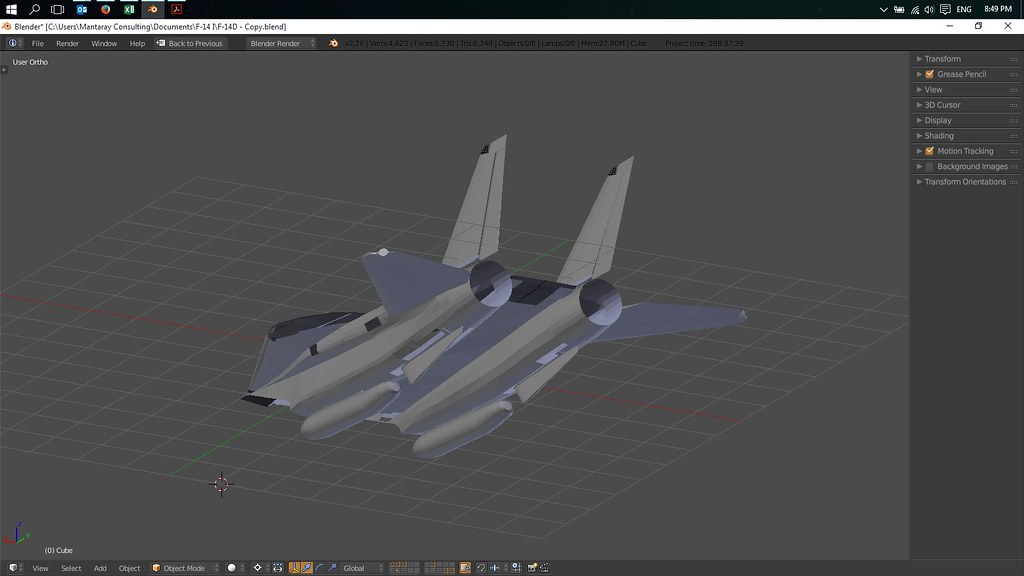
Vertical stabs started…
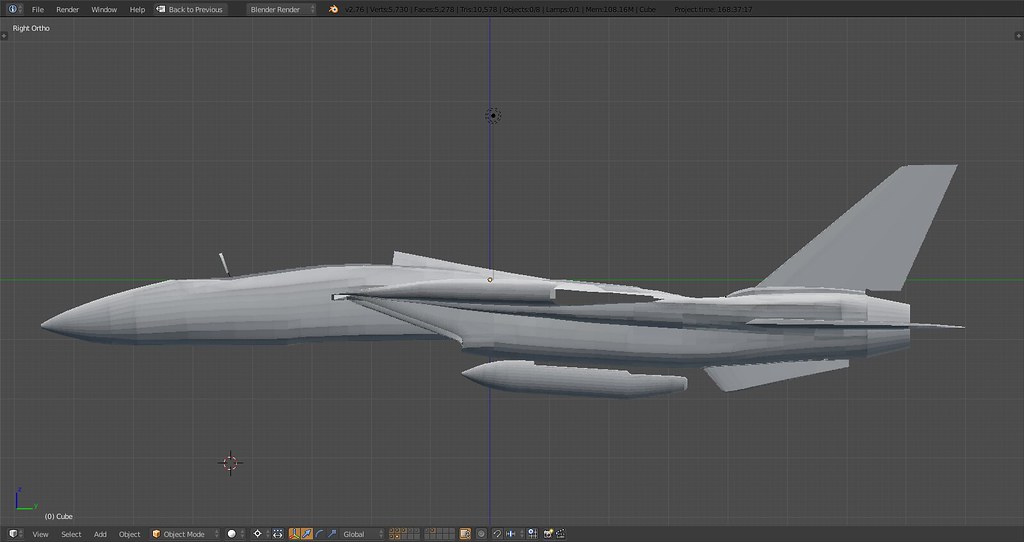
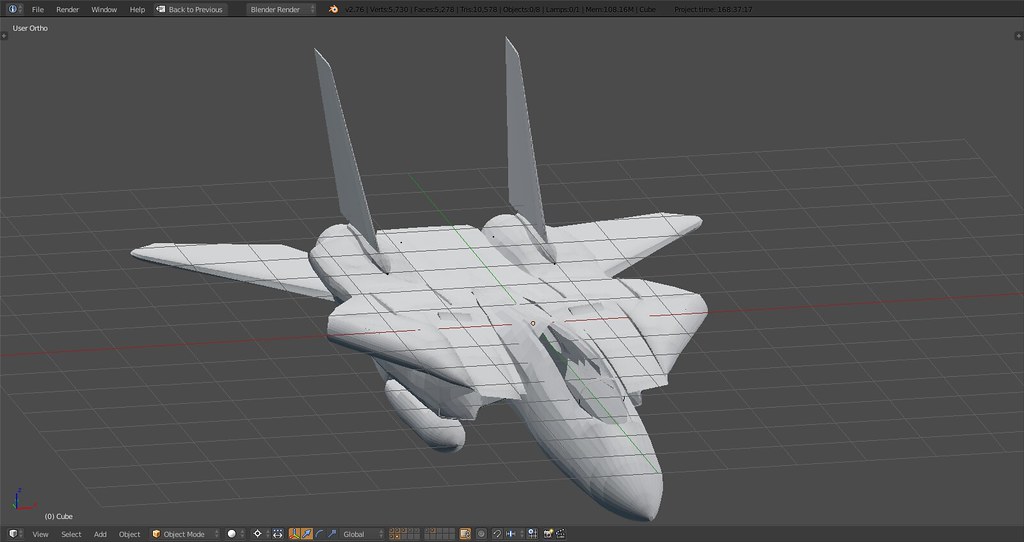
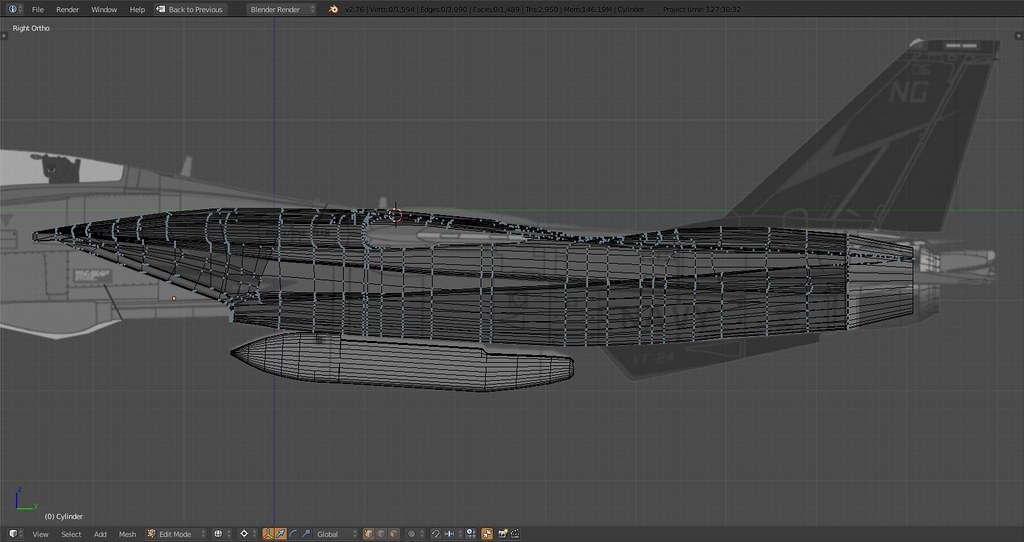
Totally reworked the side fuselage with reference images, note the triangular shape in front gradually transforming to a more spherical finish going to the rear. Also added the ‘coke bottle shape’.
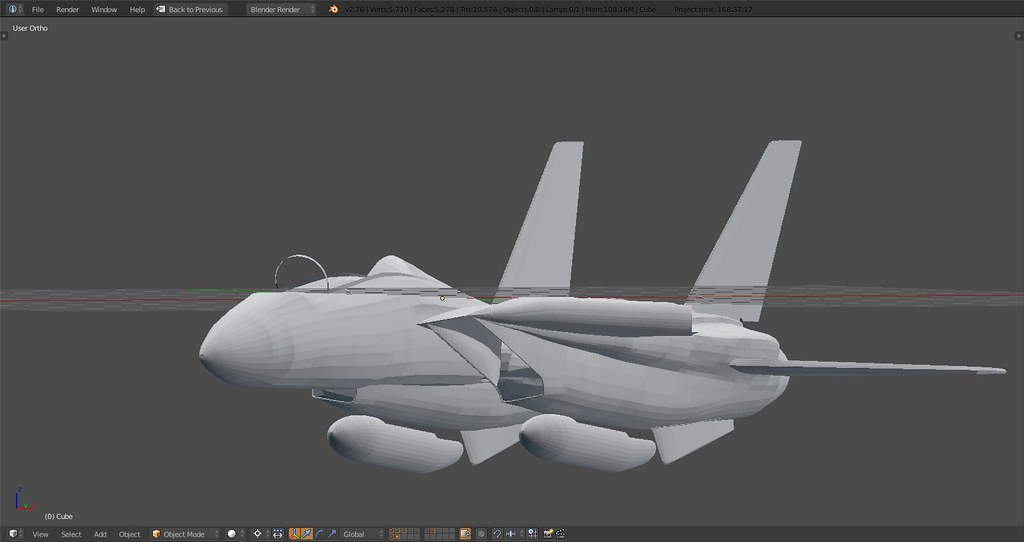
Ventral Fins with assembly and lower vents left and right…NACA duct to be done.

Blender can export to Max using the .fbx file format, using the .3ds extension doesn’t work but the model seems good with .fbx when viewing in 3Ds Max.
Standing at 10K tris now…wings next then details.
Shots made with ‘MatCap’ and Ambient Occlusion settings on.
-
Nice nice nice !!!
-
Please god, before christmas 2016 !
-
But, if not, the results will have been worth the wait, I believe.
Best regards,
-
Very nice progress, but you should use some smoothing tools not to whether bumpy the surface of airplane.
See , like Hayab’s model. -
Very nice progress, but you should use some smoothing tools not to whether bumpy the surface of airplane.
See , like Hayab’s model.
Thank you. As for smoothing, I’m a long way from that. There are many many tris and all kinds of poles in there that don’t have to be. I wanna iron those out first and have a reasonably realistic looking overall shape especially in areas where surface transition is occuring which in the case of the F-14 is in many:).Matter of fact looking at all the flawed 3D models out there (even if ever so tiny a flaw) I come to think it must be one of the toughest jets to model which is great for a first project…or the end cuz of premature frustration.
Anyway when I have a smooth ‘low’ poly version I’ll start on refining the mesh. Smoothing tools will have their desired effect when the mesh is ready.
The point on Hayabs screenshots is simply that the smoothing used in the shading for the shots works almost perfectly because I guess he’s damn good and experienced in piecing together very nice meshes without a whole lot of distortion by building it smart and thinking ahead - which I am not. If I run a Catmull-Clark shader on this model you won’t be able to see anything cuz of all my errors when it comes to hard surface modeling best practice/doing it right
-
Simply beautiful!! My dream bird. * Still in denial of her retirement *
-
Simply beautiful!! My dream bird. * Still in denial of her retirement *
Hear that man! At least some Cats are still breathing air…11/20/15:
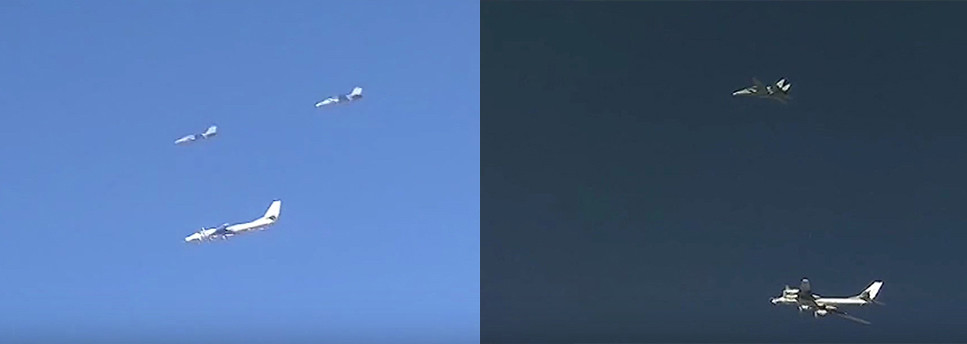
IRIAF F-14AM escorting TU-95s bombing the shit outta some out of control ISIS assets over Syria.
37 years and not looking one day older than 36, Baby.
-
Just figured out that I should have tris instead of quads so I guess I’ll convert all squares to triangles now. Downside: Takes a while. Upside: After having modeled everything in quads the structure of the model and position of elements is pretty accurate and polygon count continues to go down as I progress.
Triangles it is, Baby.
-
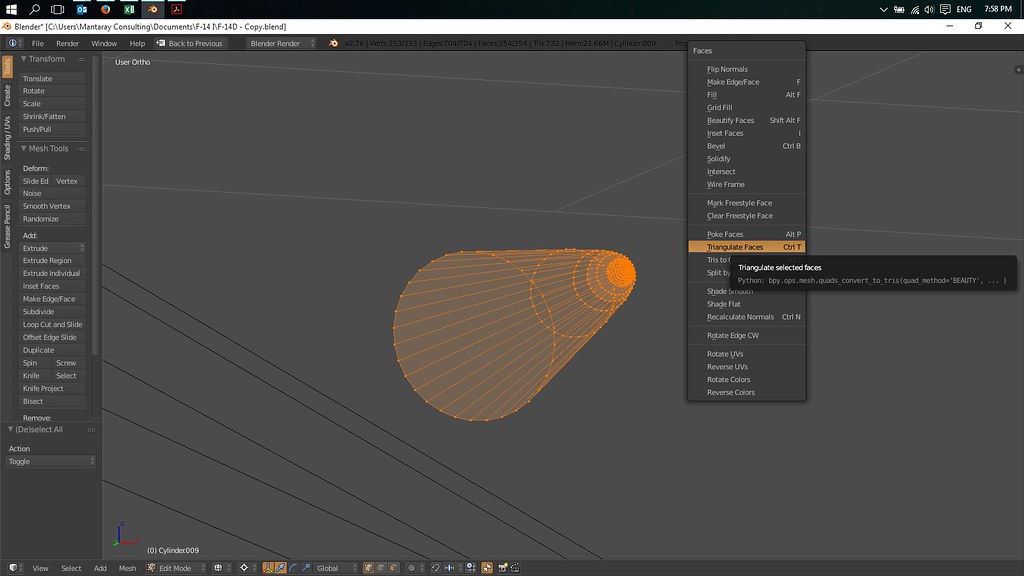
Hey Stingray. In blender there is a way to auto-triangulate your mesh:
<tab>for edit mode -> ‘a’ to select all ->
mesh menu -> faces -> “triangulate faces”Not quite as good as doing it by hand but it looks like you have high enough mesh density to not care too too much about each individual triangle orientation.
Also you can turn on better smooth shading, then all add the “edge split” modifier. Basically on edges with a higher angle than you specify it will the split in real time to have different vertex normals and look like a sharp edge in blender’s lighting engine, while those with a lower edge angle will be smooth. if you hit “apply” then that will actually take your vertex count up, and to get back to normal you’ll have to select all vertexes and “remove doubles”.
I hope this is helpful and not too convoluted to follow - I’m running, err staggering, on 40 minutes of sleep at the moment.</tab>
-
Hey Stingray. In blender there is a way to auto-triangulate your mesh:
<tab>for edit mode -> ‘a’ to select all ->
mesh menu -> faces -> “triangulate faces”Not quite as good as doing it by hand but it looks like you have high enough mesh density to not care too too much about each individual triangle orientation.
Also you can turn on better smooth shading, then all add the “edge split” modifier. Basically on edges with a higher angle than you specify it will the split in real time to have different vertex normals and look like a sharp edge in blender’s lighting engine, while those with a lower edge angle will be smooth. if you hit “apply” then that will actually take your vertex count up, and to get back to normal you’ll have to select all vertexes and “remove doubles”.
I hope this is helpful and not too convoluted to follow - I’m running, err staggering, on 40 minutes of sleep at the moment.</tab>
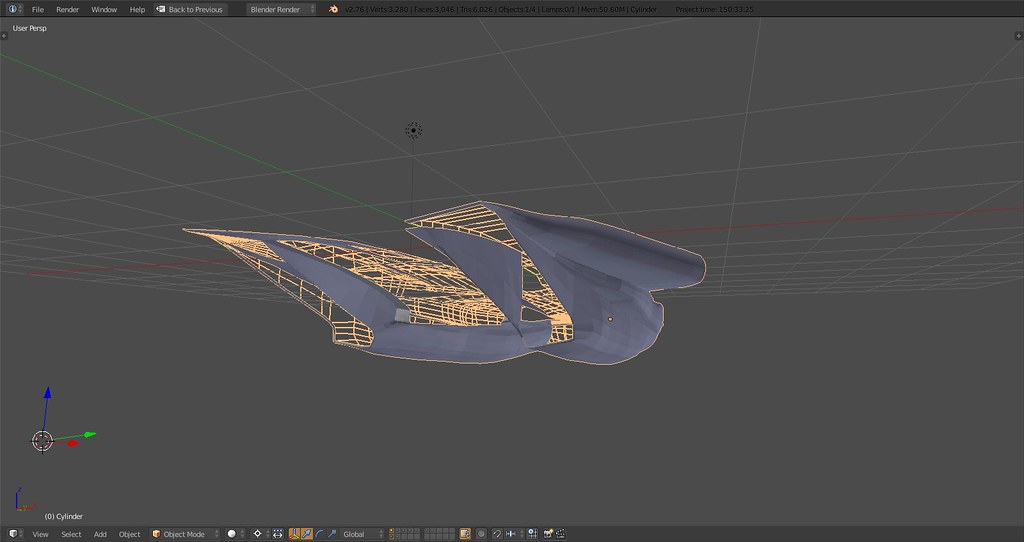
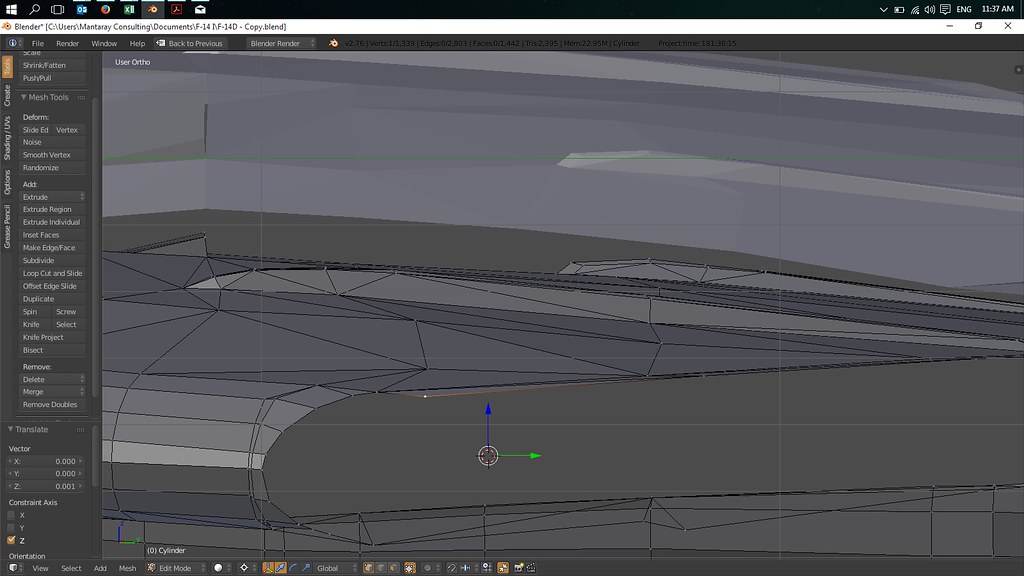
Thankx a bunch man. You really know Blender shortcuts and functions :). Applied it already:
You’re right on the mesh as far as density goes, I triangulated the fuselage front and apart from some modifications it saved a lot of time.
On the glovebox however I’m doing it manually and pretty much changed the layout of faces but kept all positions…upside is I was able to reduce the tris count on the glovebox with details and engine pods from 3100 to less than 1900. The proportions and transitions are actually much better now even though there’s much less density.
Some wips:
I guess at around 200hrs I’ll have the box done.
-
Keep the great work Stingray!!!