WIP: F-14 B/D
-
Your project is like 24 carat gold for me.

-
Cant wait to see this beauty flying!
Have you already managed to port it in game? I haven’t seen any pic of it scrambling…
-
Any RoseGold flavor? :rofl:
//Arty runs and hides…
HOT LIST

System Specs:
i7-2600K @ 4.8 Ghz WaterCooled / 32GB Ram. 128GB SSD/1TB SSD / GTX1080Ti 11GB DDR5X / HOTAS COUGAR. TrackIR 4 / 3x24" Mon. (res:5760x1200) / Cougar MFD's / Wheel Pedals / Win 10 64 bit.

-
Cheers
EGHI -
The tagline fitting this post the most is probably ‘Under Construction - We’ll be back soon!’ :).
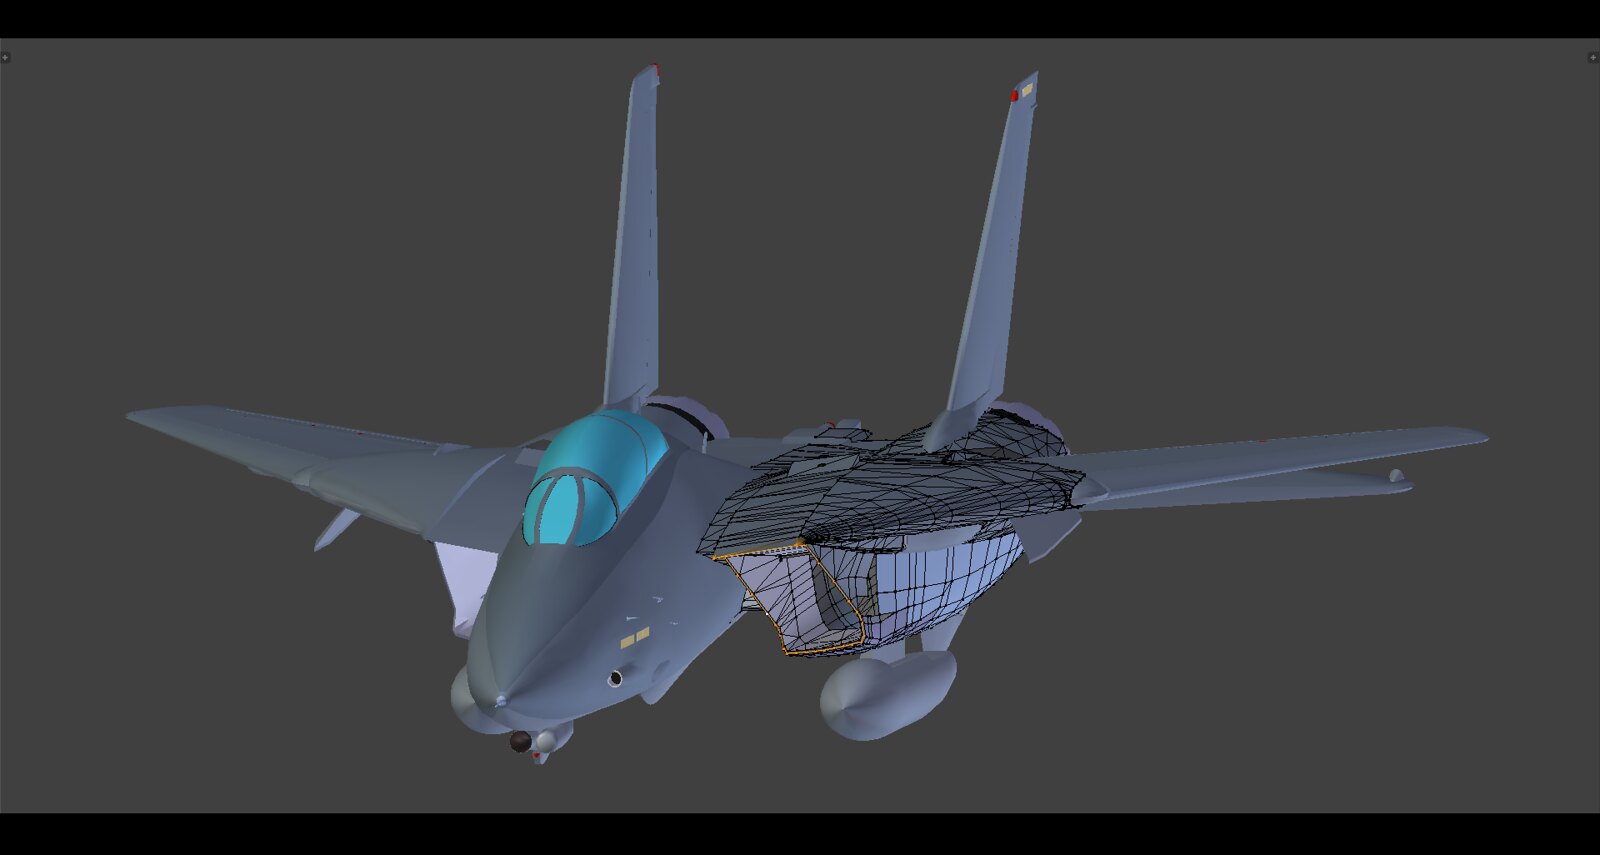
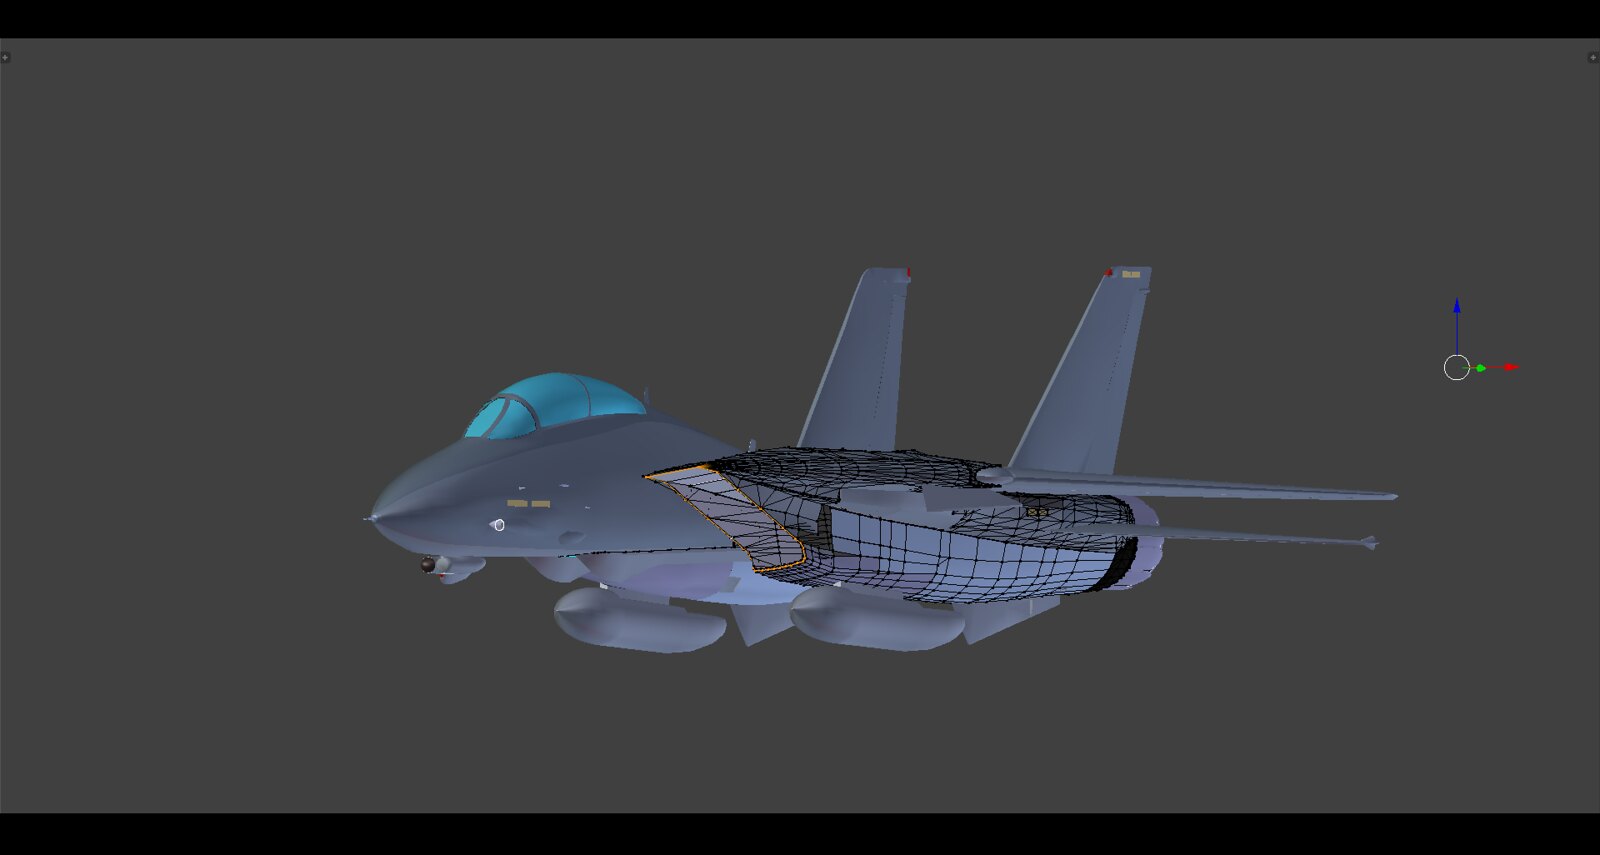
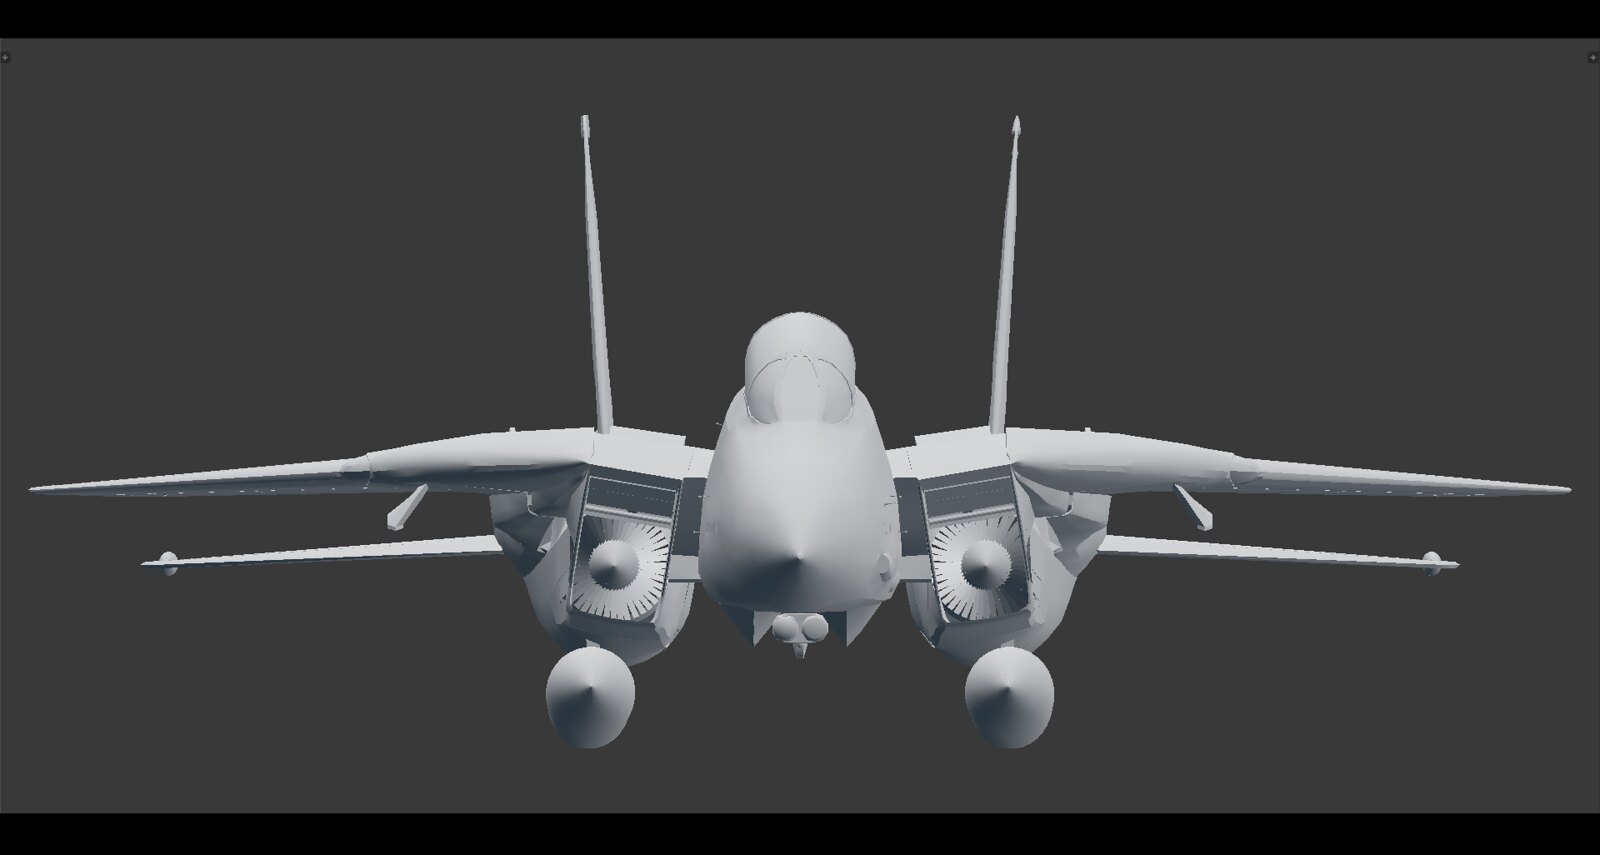
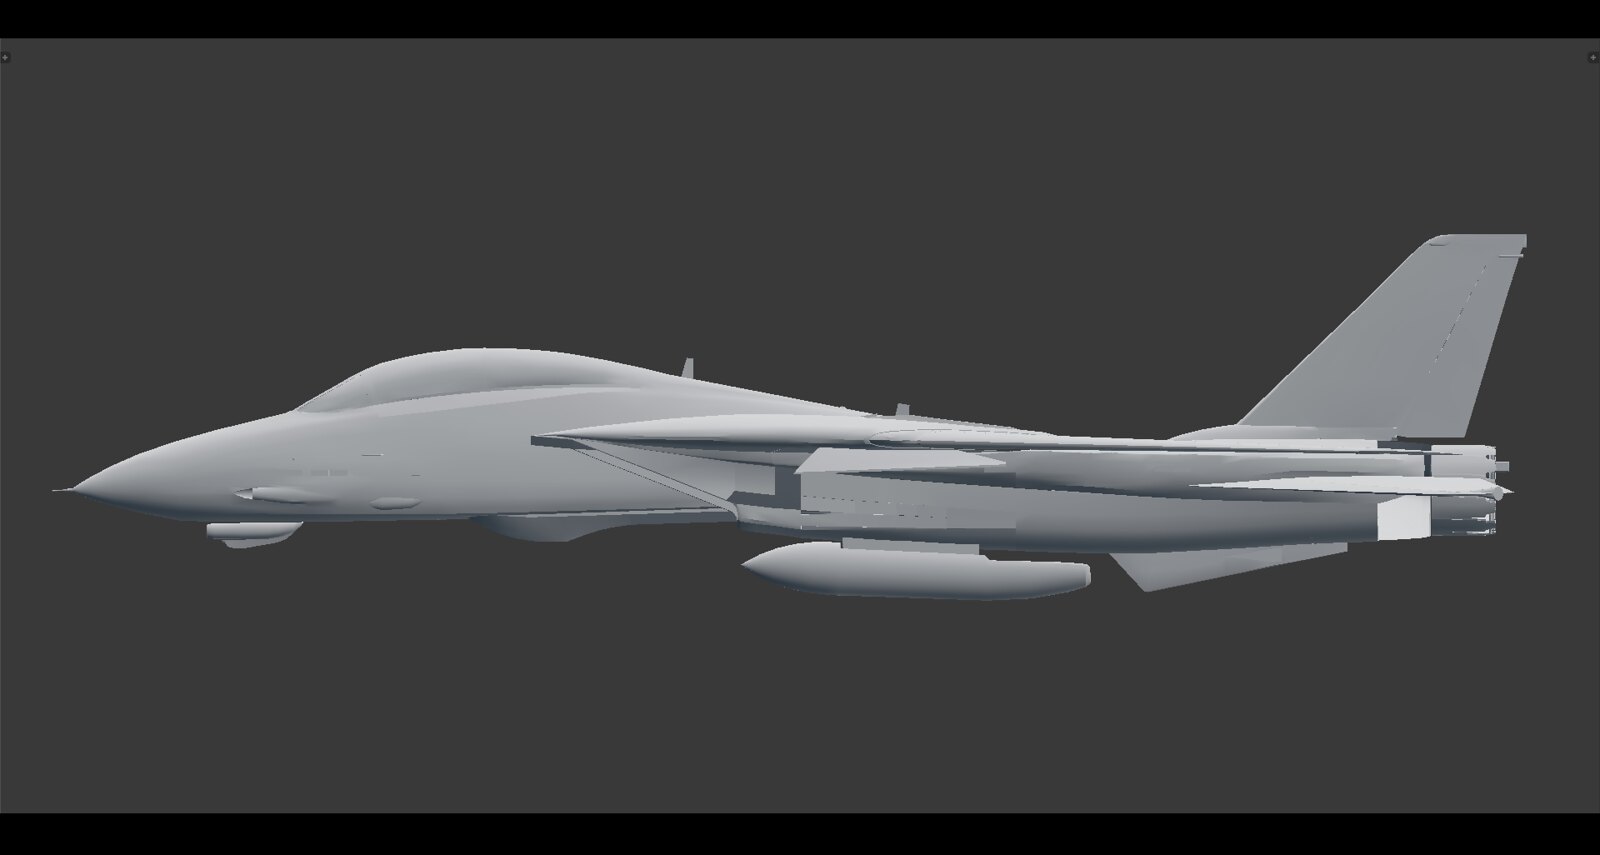
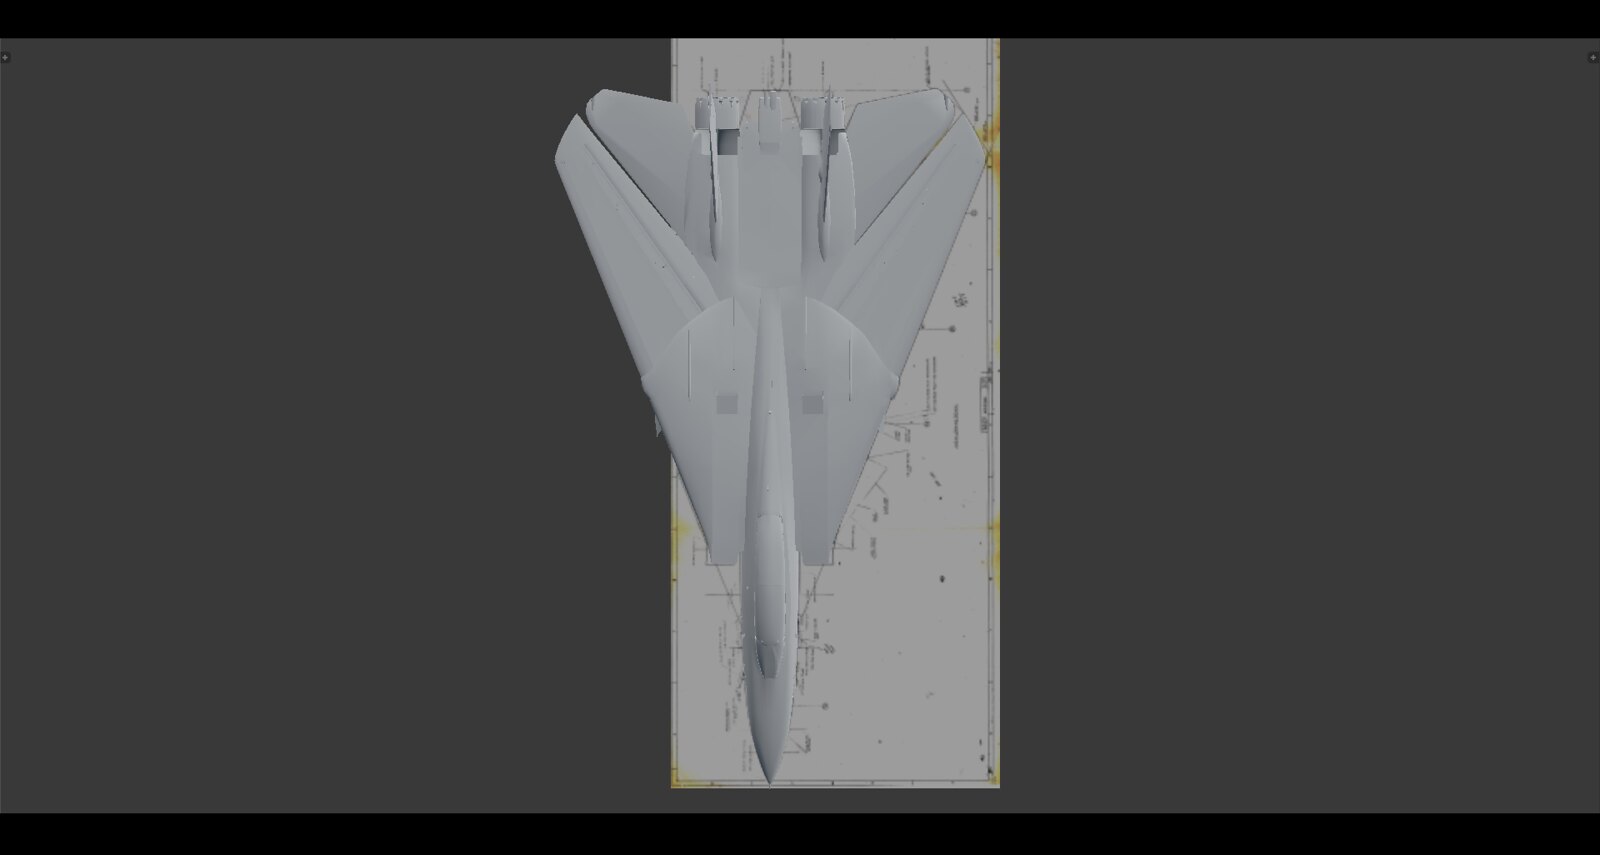
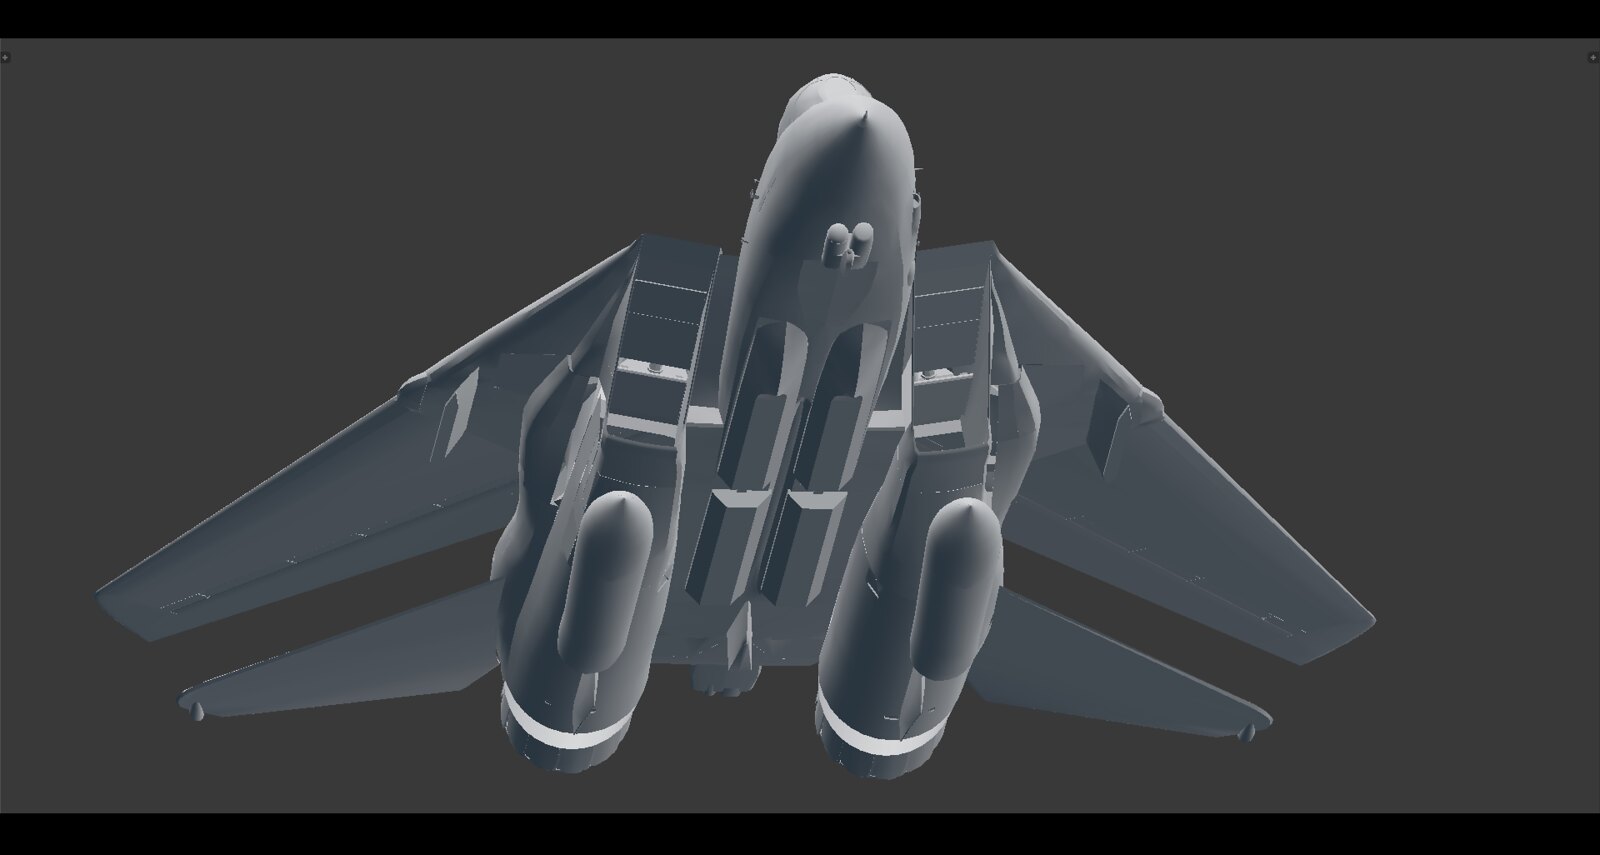
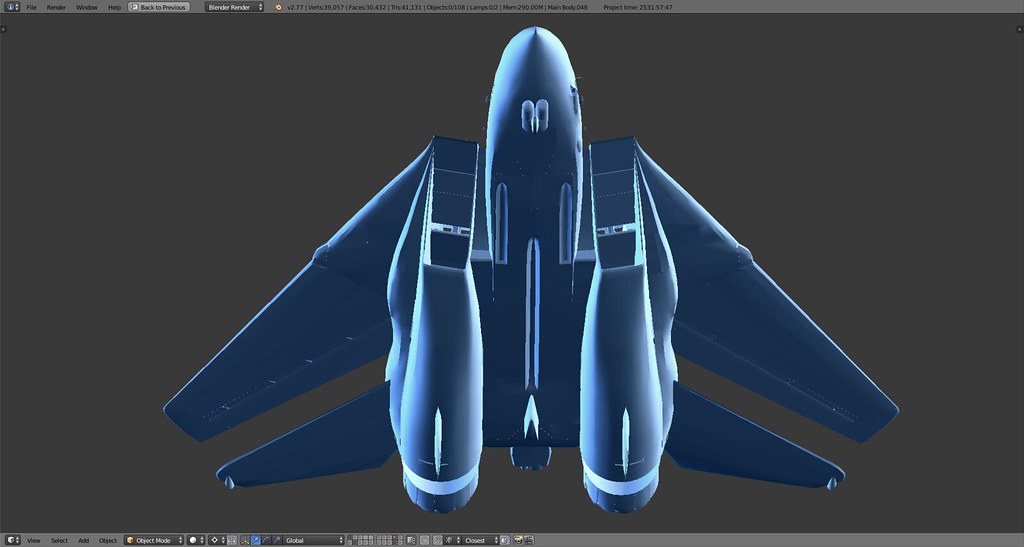
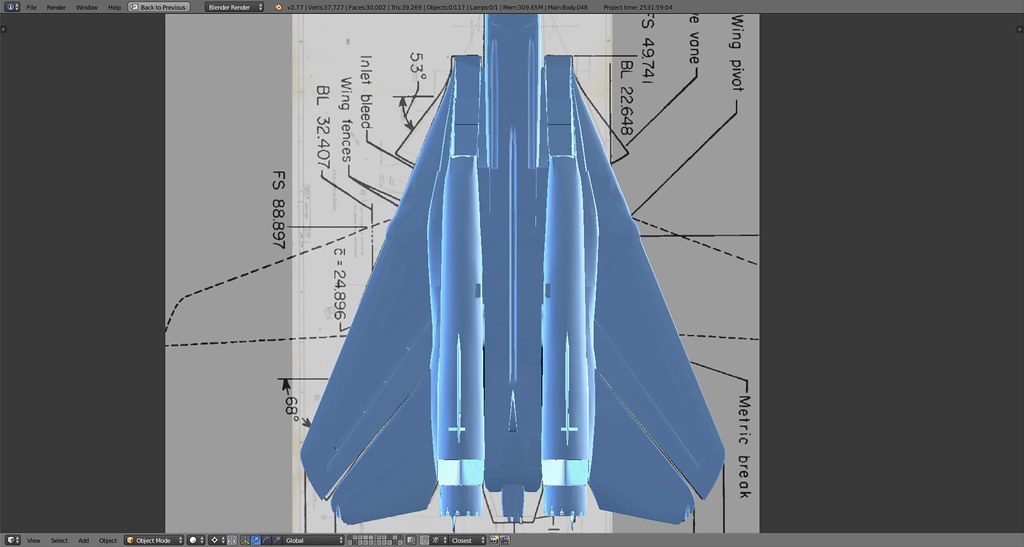
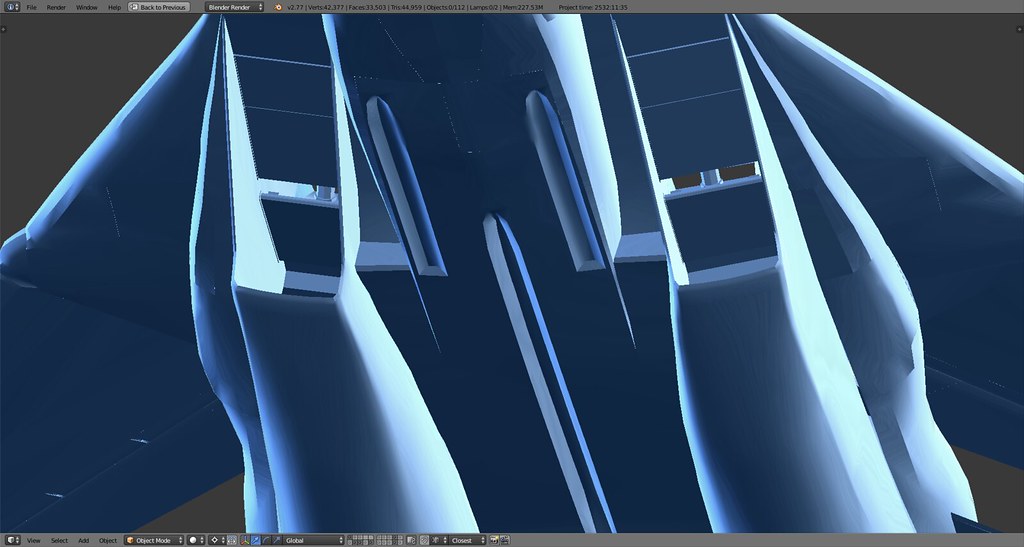
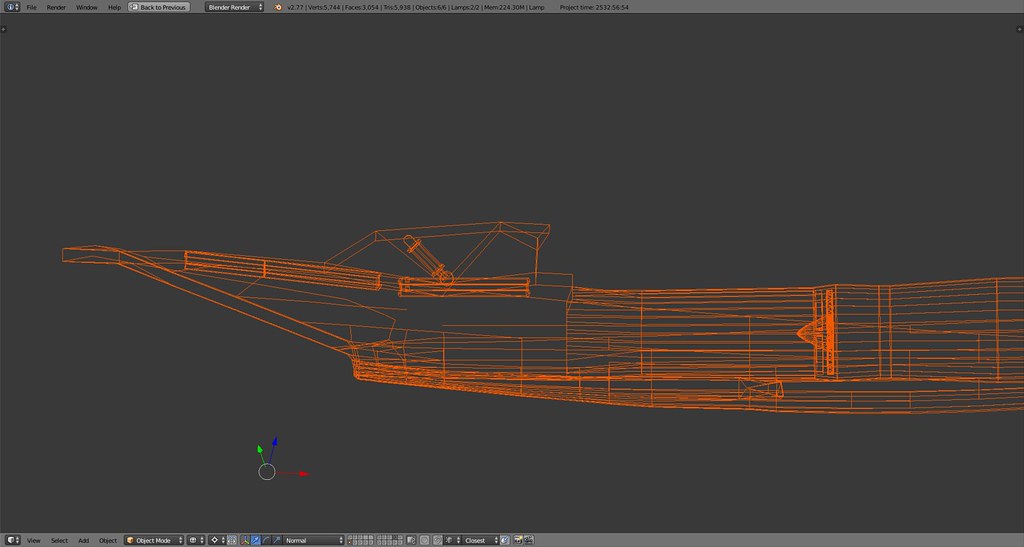
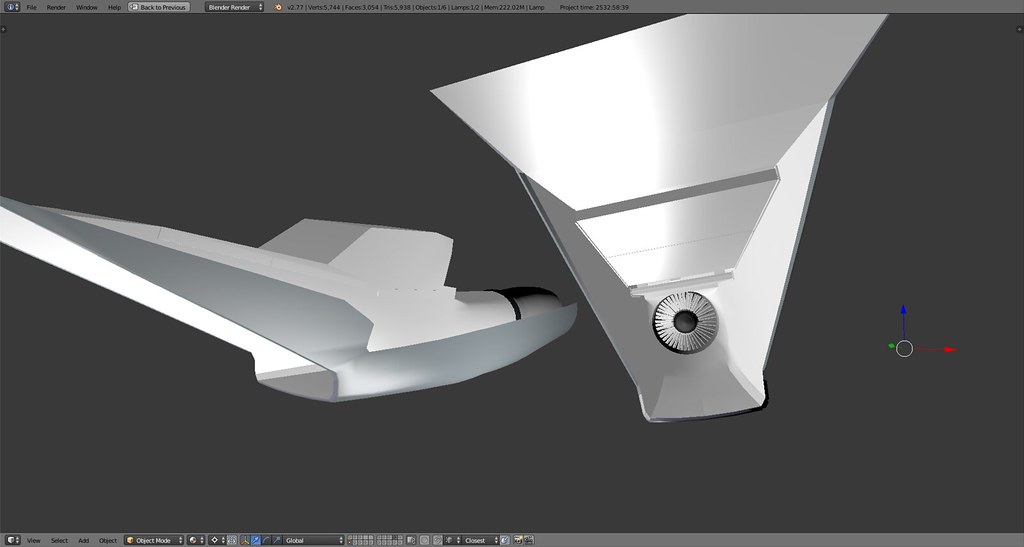
The engine pod correction now spread to the ‘waistline’ meaning the side fuselage housing the landing gear and all kinds of other stuff. Check the original landing gear doors to compare to the shape it had before. Also in the front view close up you’ll see that the center of the engine compressor is moving closer and closer to the center of the intake. The bottom shots show the intakes being moved further and further apart.
All in all it’s kinda gutted at the moment even though it looks worse than it is BUT the takeaway is clearly that this correction gives the model the final and original Tomcat look. I see it during modeling that the intake positioning is moving all other parts into place (gear doors, side walls, etc.).
On a sidenote the part connecting the front fuselage with the engine pods in front is positioned much lower and closer to the bottom of the airplane in almost all other models and I was about to move it down as well until I check my original cutaway vertices view and this part on the original Tomcat is in fact right about where it sits in the model now so it will stay there - no need to change all parts just for the sake of it :D.
Anyway, the time spent on this correction is well worth it cuz it’s all about proportion and scale when it comes to authenticity of these models regardless of polycount and I intend to get as close as possible to the real thing. If you know the big cat and zoom out on these pics you will notice that it’s looking pretty good and much better than before.
Enjoy…
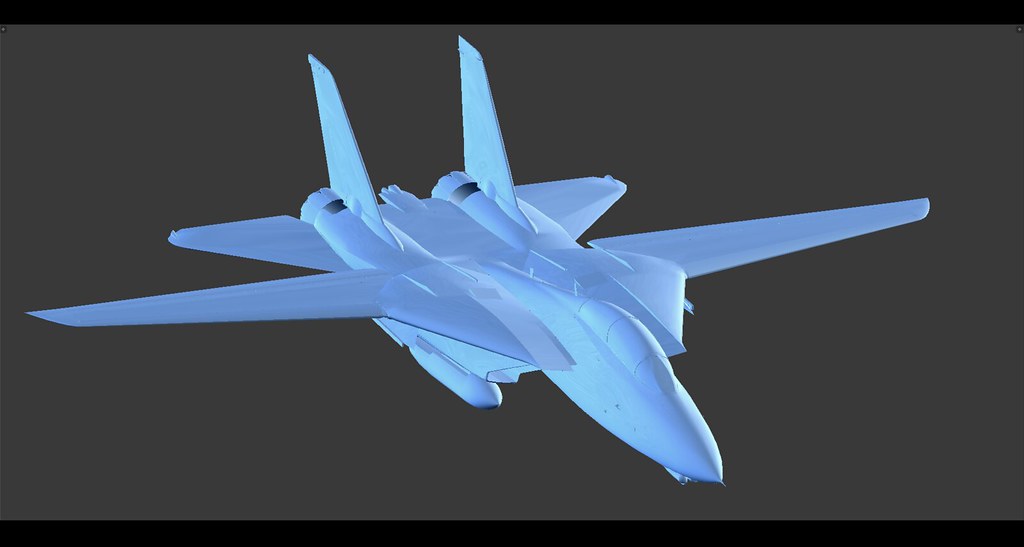
Matcap claystyle:
Moneyshot #1

Note the difference along the waistline, the MLG doors sit quite a bit too far out while the intakes sat too far inboard:
Moneyshot #2:
Epic stencil recreation, Baby…

-
I like it.

I would also see lower LODs.Cheers,
EGHI -
I like it.
I would also see lower LODs.Thanks! I don’t get it, you would like to see lower LODs? If that’s what you mean those will be generated later on. If I didn’t catch your meaning please clarify.
-
He means LOD2/LOD3/LOD4/LOD5, which are the lower loads. Each is the aircraft at different LOD distances.
You know, you don’t see the entire aircraft in the lower LODS.
LOD1 you see everything>>>LOD5 you see basically a triangle. Or which ever LOD is last depending how many you make.
C9
-
@Cloud:
He means LOD2/LOD3/LOD4/LOD5, which are the lower loads. Each is the aircraft at different LOD distances.
You know, you don’t see the entire aircraft in the lower LODS.
LOD1 you see everything>>>LOD5 you see basically a triangle. Or which ever LOD is last depending how many you make.
C9
Thanks for the clarification, am aware of what they are but he said ‘I would also see lower LODs’ - what’s that supposed to mean? I don’t see any. Haven’t made any yet. Prolly will at some point :D.
The model as it currently stands is more something like an LOD 0.
-
I think he means included when it’s done?
But then again maybe he want’s to see them now?? lol
The model as it currently stands is more something like an LOD 0.
As it should be.
C9
-
@Cloud:
I think he means included when it’s done?
But then again maybe he want’s to see them now?? lol
As it should be.
C9
True that. In that case the answer is I’ll include the number of LODs that is common and ensures optimal performance and visuals under any given circumstance. Can’t say more than that at the moment.
-
Thanks! I don’t get it, you would like to see lower LODs? If that’s what you mean those will be generated later on. If I didn’t catch your meaning please clarify.
Just don’t forget to build lower LODs too. That’s what I meant.
-
-
just for the fun of it why don’t you pass the model to 3dsmax and export it to LOD and import it to LodEditor and see how it goes?
Sure it will need an optimization first as I’m 99% sure LE will crash. Although when replacing a model it accepts the heavy load but afterwards Falcon Editor or Falcon its self some times crashes when it goes to load the model. I couldn’t spot the threshold but it was higher than LE IIRC.
When u import as a new model in LE if it has many polys then it will crash… so you can’t import and might end up with a fubared 3d database.HOT LIST
System Specs:
i7-2600K @ 4.8 Ghz WaterCooled / 32GB Ram. 128GB SSD/1TB SSD / GTX1080Ti 11GB DDR5X / HOTAS COUGAR. TrackIR 4 / 3x24" Mon. (res:5760x1200) / Cougar MFD's / Wheel Pedals / Win 10 64 bit.
-
As tempting as that might be at this point it would be pointless. This project has taken a long while and will take a bit longer but it lives on step by step development and closing one door before opening the next. Right now I’m finishing the hard surface modeling and optimizing the entire model for the import into Max. The whole point is that when that transition occurs there’s no going back, at that point the geometry and texturing will be finished. After that point I’ll deal with the whole animation, DOFs, ptypes, LODs and so on.
I realize that this makes following the project somewhat unexciting at this point and some might want to just get a glimpse of the model in game but I need the order and structure in order for this not to end up where almost all Falcon mods do - the unfinished mod boneyard :).
So bear with me, the goal here is clearly that we will have (at least visually and ‘mechanically’ within the polylimit) the best F-14D Tomcat model in any sim anywhere period the end. And yes, I know all past and current offerings and developments :).
Rivetcountering on…Baby.
-
Selfish Bump to keep it on the first page……
-
Noticed how it was dropping :D.
Bump this:
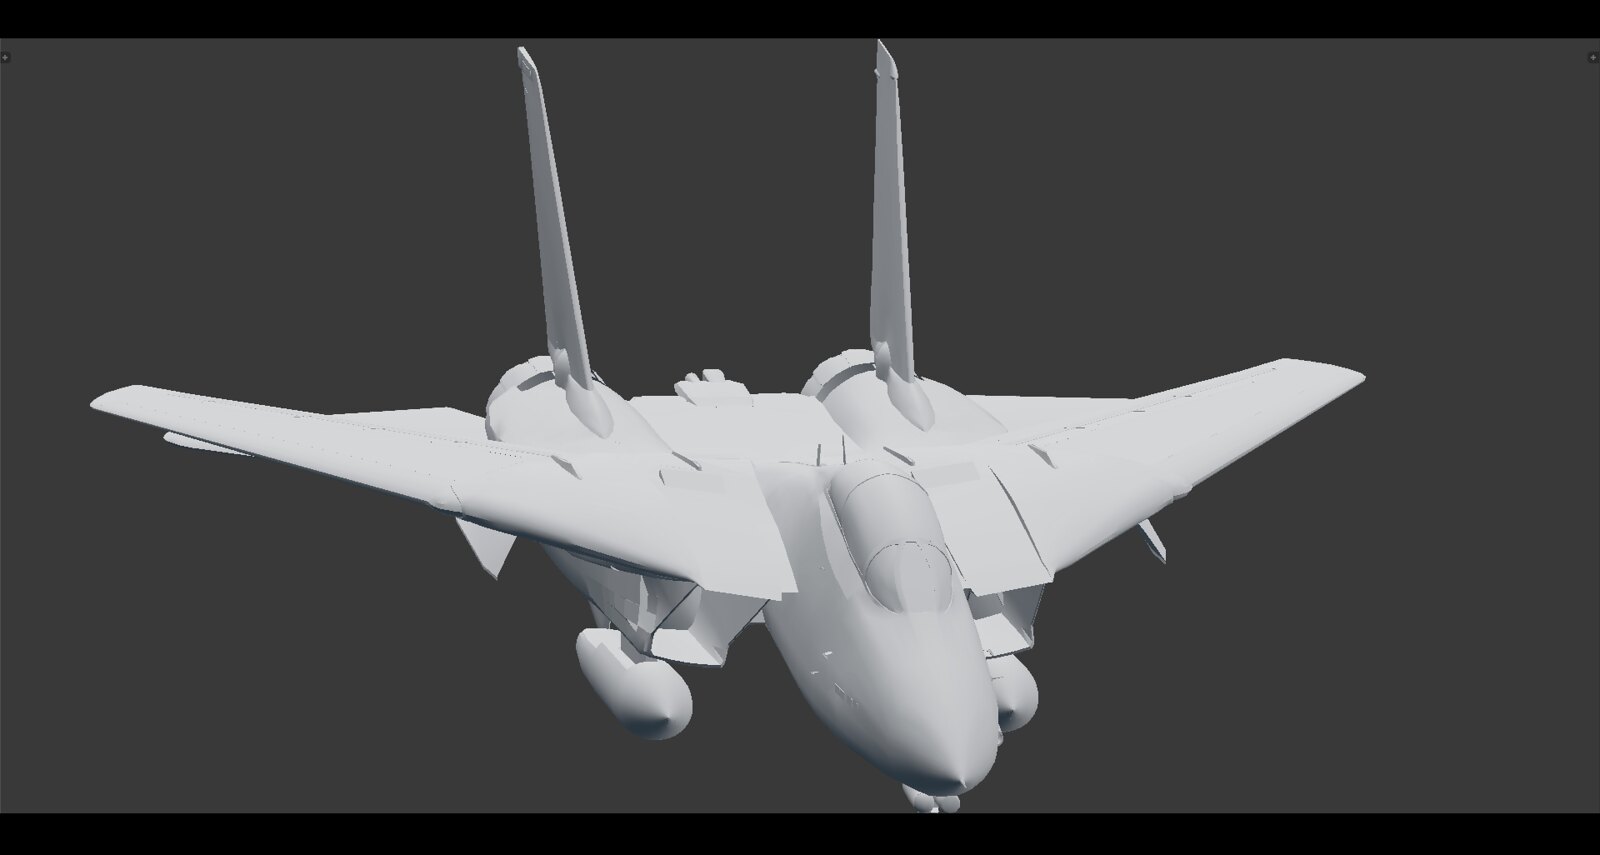
Fuselage is in one piece again. Tweaking the engine pod shape and proportion right now. Hopefully some renders tonight.
-
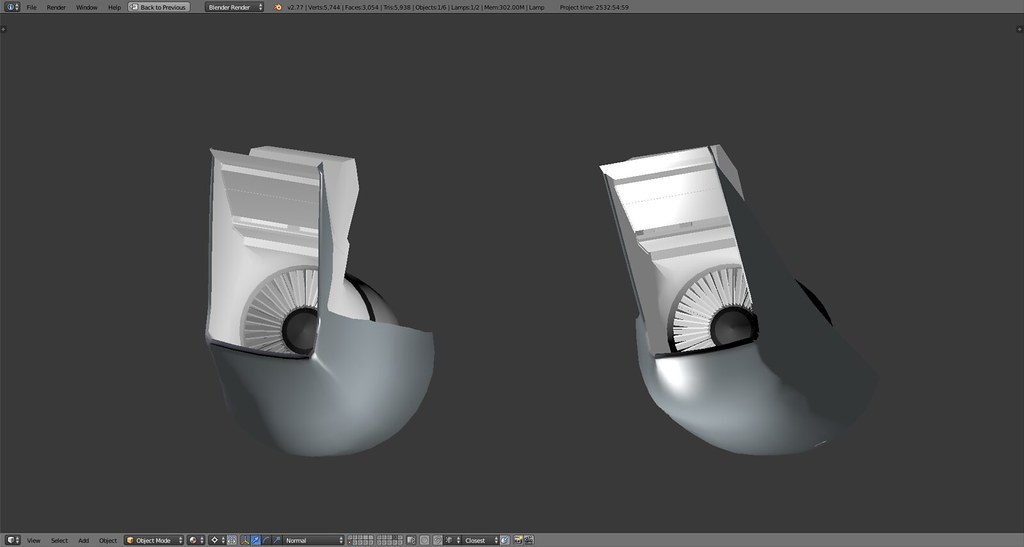
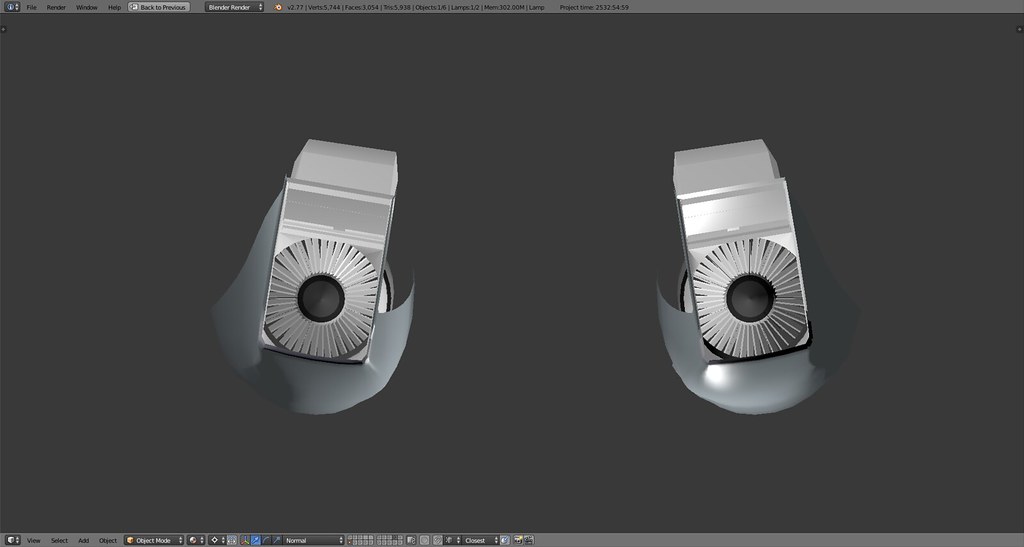
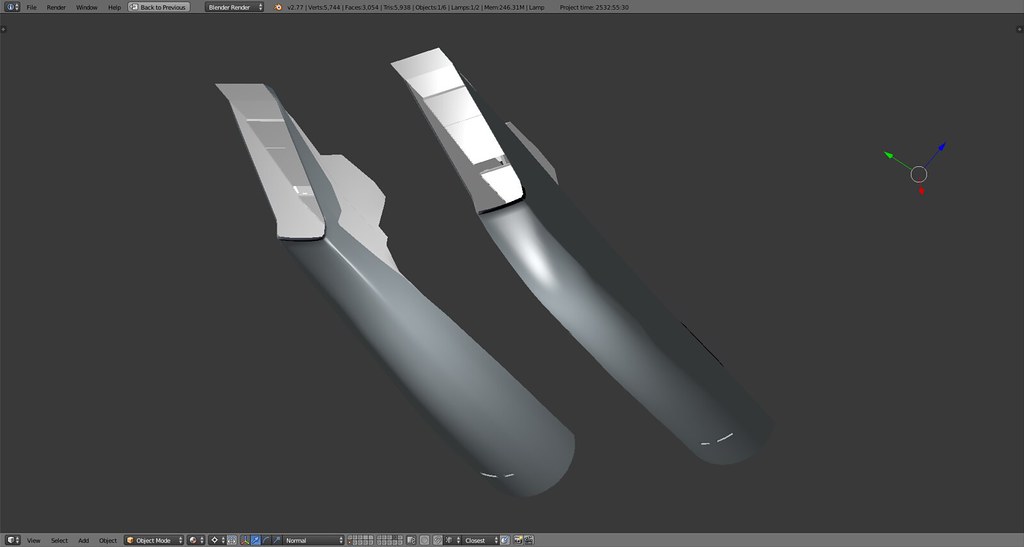
Sometimes you take a risk with a model like ripping apart and eventually completely rebuilding almost the entire bottom side of an airplane and you don’t know if it’s worth the risk or even gonna work out. In this case I’m happy to report it was absolutely worth the risk and it worked out quite nicely. I’ll let the before and after images speak for themselves. The fuselage side including the main landing gear doors have also been completely reworked in line with the pods.
Notice the silky smooth surface of the engine pods. All quads for now, assembled them basically by extruding the engine shroud from behind and the intakes from the front. Merged them and then beveled some edges. All the time trying to keep the inside out kink the pod shape has upfront, around the same area where it transitions from a rectangle to a circle. Wasn’t exactly a walk in the park but I’m quite happy with the result.
ToDos now:
- Weld everything together
- Iron out some details
- Finish the intake canal toward the compressor
- Reattach the NACA duct on the inside walls of the pods
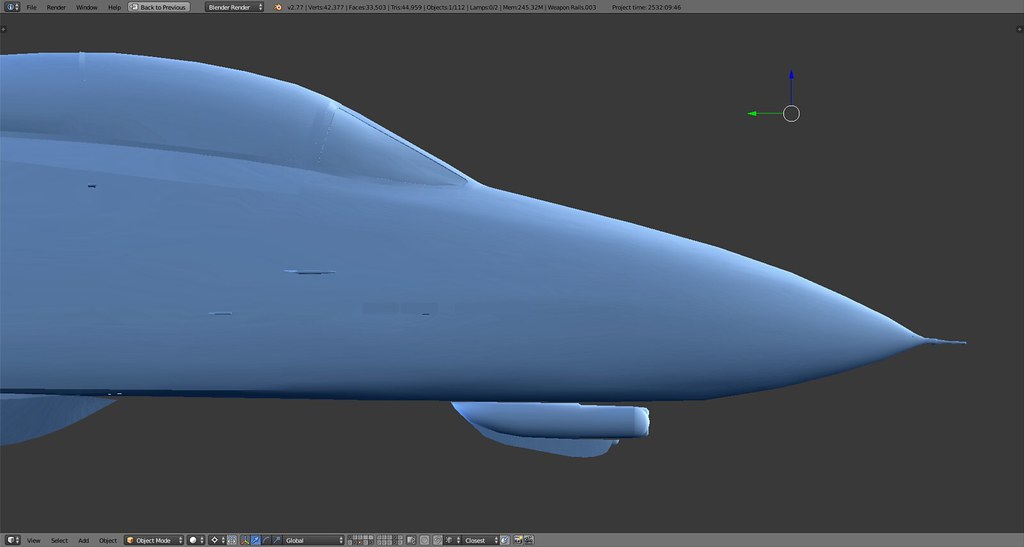
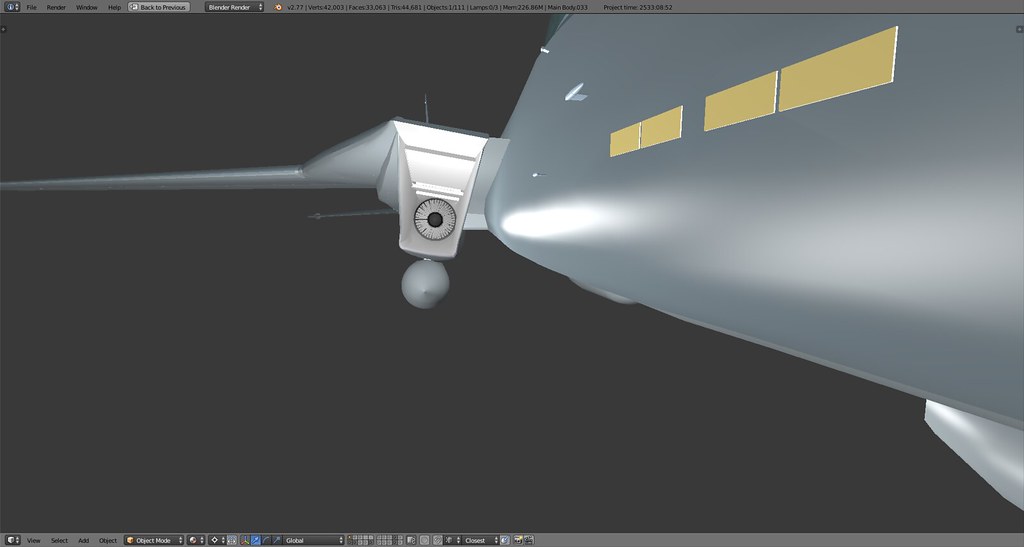
I also rebuilt the nose and the bottom section of the front fuselage, much smoother and also slimmer now. Difference almost not noticeable but the look works much better now. AC lights and gun still need to be finalized. Then the entire bird will be welded together.
Here goes:
Before

After
Before

After

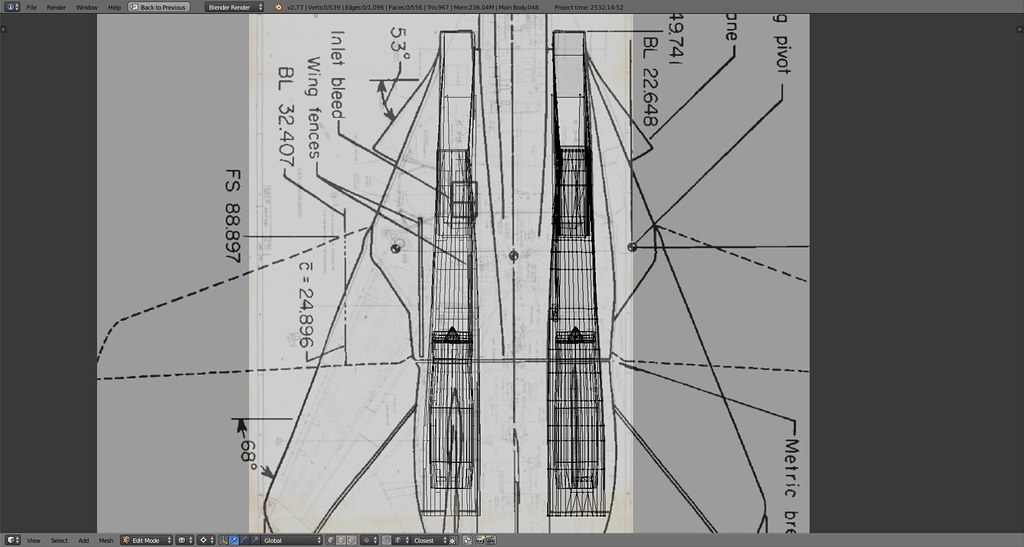
Blueprint before
After

Before (note the bottom right near the edge of the left intake, that is how wide that section was before):
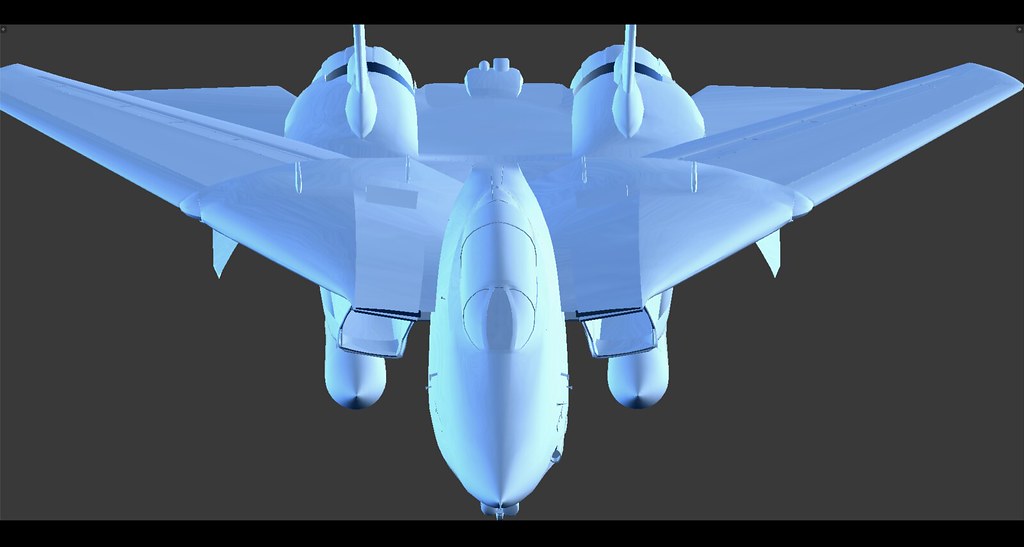
After
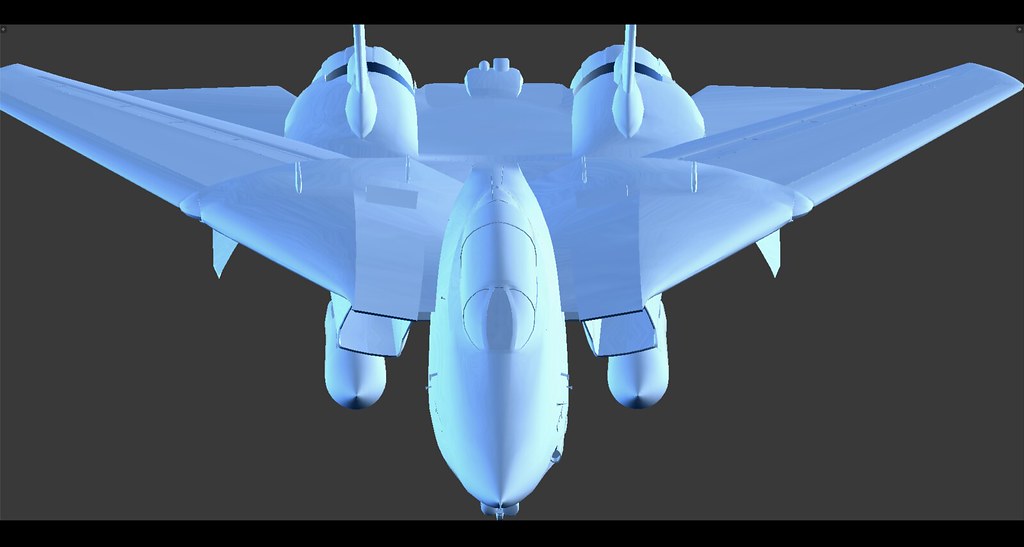
Some detail shots:
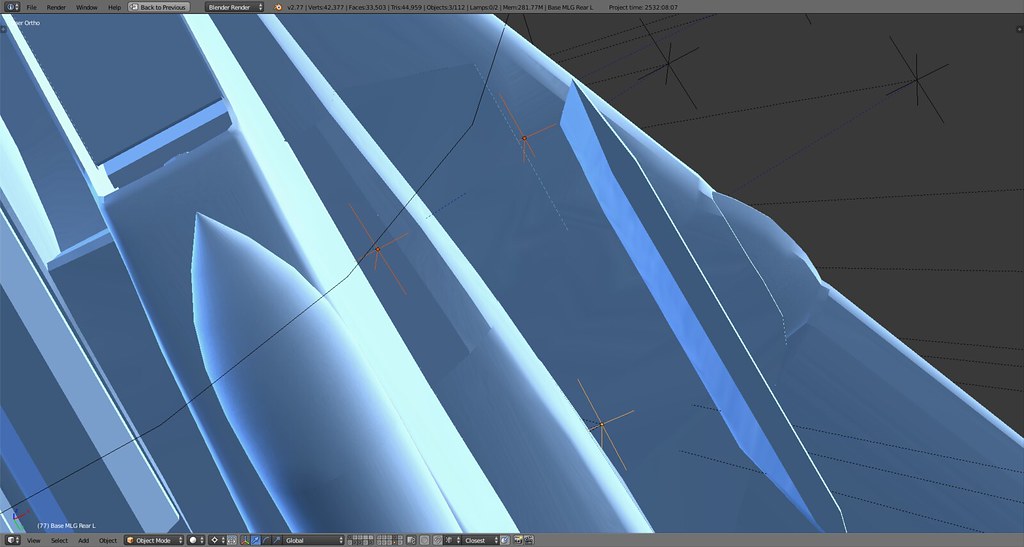
The crosses represent the baselines for the gear doors, note how far the line has been moved to the inside following the correction
The nose, check the front edge of the weapon rail fairing for reference where the bottom line used to be
Good news is there is no other part that was that much out of line :).
-
I don’t think there’s a better engine start up video out there…
Red Rippers Vf-11 F-14B Final fleet version. Complete procedure including tests of all moving surfaces, refueling probe, front landing gear compression and so on.
-
Crunching through the intake…

Still tweaking the lower front edge of the pod…
Realign the MLG doors, smooth out the shape of the sidewalls, reposition the rigging and weld everything together and we’re talking about a Tomcat again :D.